
This blog will walk through how to capture Tweets matching a certain hashtag and export them to an AWS DynamoDB via the Twitter APIs.
This is the first of several silly and mostly pointless experiments I will post this summer. Next posts will look at using AWS IoT, AWS Lambda and VMware Cloud on AWS and the last one will look at using AWS Rekognition to authentication into a VMware vCenter.
Now on paper, you might think it has very little to do with my day job at VMware, where my role is drive adoption of VMware Cloud on AWS. And you’re not wrong…
But 1) this is my blog and I can write what I want and 2) I wanted to see what customers and partners were thinking about VMware Cloud on AWS and therefore what they were Tweeting about our solution.
What if we could capture all Tweets with the official hashtag #VMWonAWS and capturing this info into a database? What if we actually use an AWS database for this?
So I Googled my way around and found that Twitter had public APIs and that somebody had already built a Python script to populate a DynamoDB table with the content of a Tweet matching a specific hashtag.
I believe this GitHub is where I found this script originally but let me know if I got the wrong source.

The Python script listens to the Twitter APIs for a specific hashtag and uploads the whole Tweet into an AWS DynamoDB database.
AWS DynamoDB:
First, a brief intro to AWS DynamoDB. Like many of the AWS services, it has a funky name and is a managed service.
DynamoDB provides the following benefits:
- Fast, fully-managed NoSQL Database Service
- Capable of handling any amount of data
- Durable and Highly Available
- High-performance (runs on All-SSD storage)
Now, the fact I was able to do this with my limited knowledge of Python and even lesser knowledge of DynamoDB can be credited to 1) the person (Rafael if I’m not mistaken) who created the Python script in the first place and 2) AWS’ ability to build services that can consumed with ease by ignorant people like me.
When I run the script, the Python script will listen to the Tweets with the hashtag I specified and will display them on the console and upload them to the DynamoDB table:

When you log on the DynamoDB console, you can see all the Tweets, who Tweeted them and when, in which language they were sent, etc…. Based upon this, you can start getting a sense of what people think about your product and you can therefore update your product or your marketing campaign accordingly.
If I had the time, I would look at how I could apply sentiment analysis to the data in the DynamoDB and getter a clearer picture of what people feel about our product… But that’s for another post!

Tutorial
It’s actually fairly easy to set up, even if you have very little experience with Twitter APIs, AWS or Python.
Step 1 – Twitter APIs keys
First, you need to log on Twitter and request a key to access the APIs. You will need it later. Go to the developer portal, log in with your Twitter credentials, create an app and request consumer keys and access tokens.

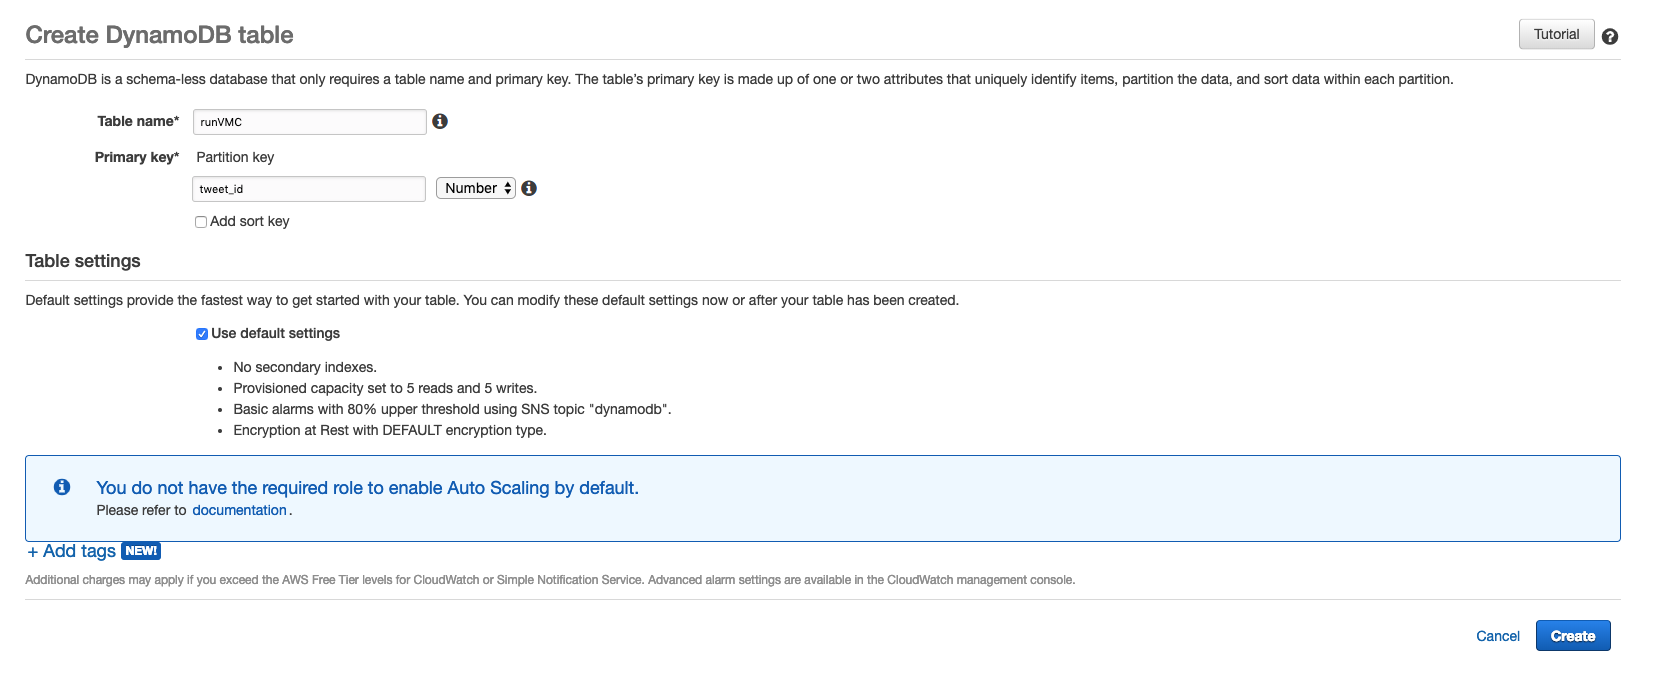
Step 2 – Create a DynamoDB table
Secondly, you need to log on to AWS (remember you can use the AWS Free Tier for this), access the DynamoDB services in the region of your choice and create an empty table. Make sure you specify “tweet_id” as the partition key and “number” as the type of partition key.
Together, the ‘partition key‘ and ‘partition key type‘ make up a ‘primary key‘. DynamoDB stores and retrieves each item based on the primary key value, which must be unique.
Step 3 – Create AWS credentials and keys
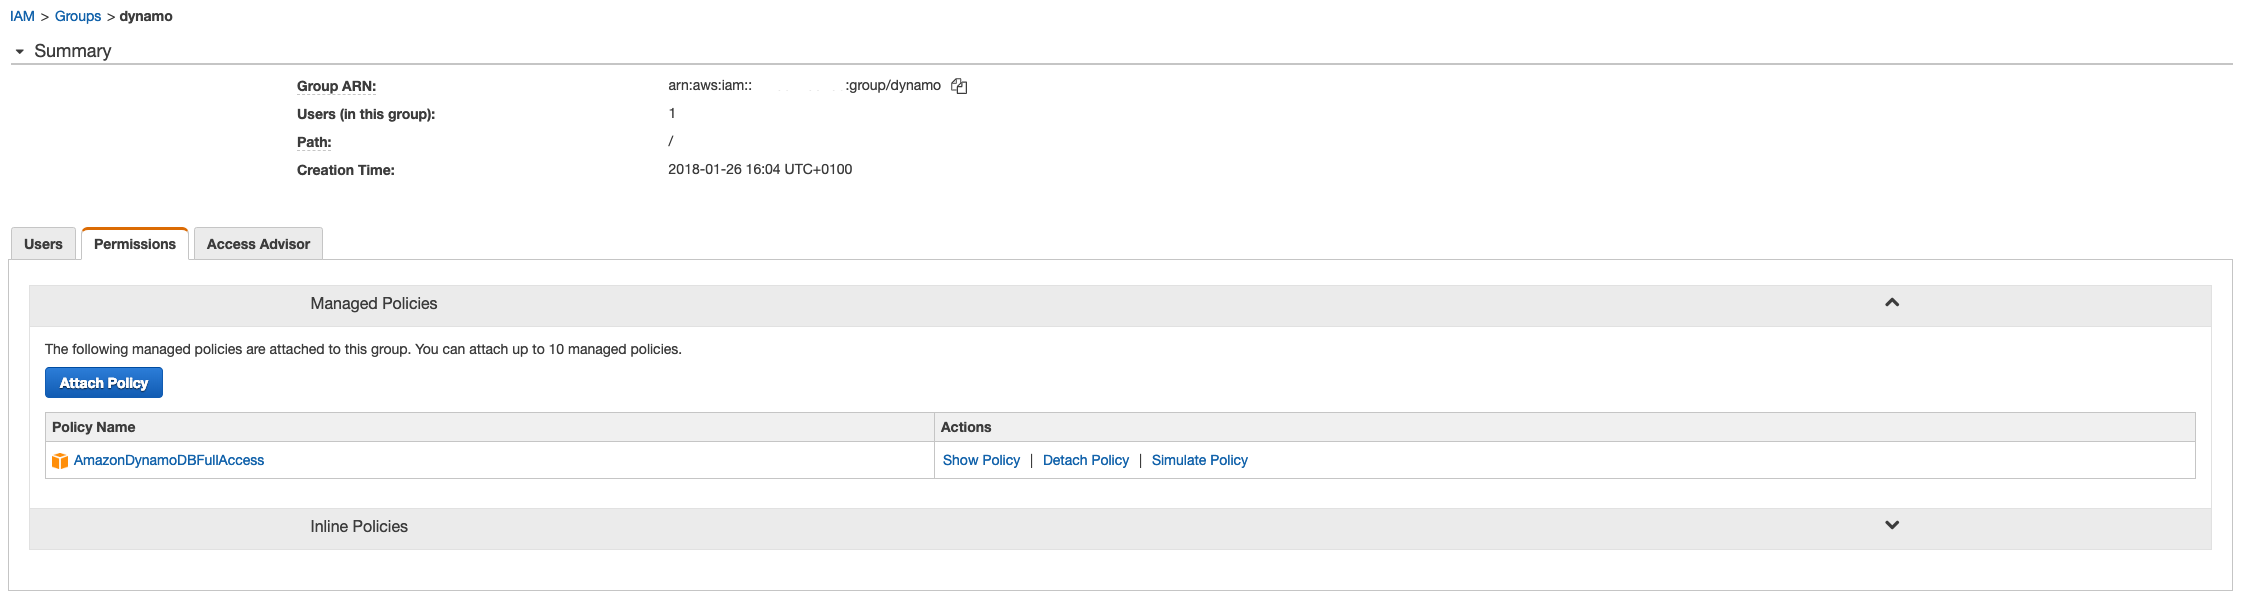
Thirdly, you need to create AWS access key and secret access keys in AWS to allow your client to update the table with the tweets. Mine have DynamoDB privileges. Go to the AWS Console and then to the Identity Access Management (IAM) portal.
I created an IAM Group with full DynamoDB access and a user (twitter_api) in that group. We then created an access key and a secret access key for this user.

Step 4 – Update the Python script
Fourth, let’s update the python script below. Change #VMWonAWS with the hashtag you want to monitor. Update the Twitter access keys with the ones you created in Step 1. Update the script with the region of your DynamoDB table (mine is in Frankfurt ‘eu-central-1’) and the name of your table (mine is called ‘VMWonAWS’).
The lines highlighted below in the Python script are the lines that need updating. Save the Python script as dynamo_stream_listener.py or alternatively, get it from the original creator on GitHub.
import boto3
import tweepy

from config import get_config

TRACK = ['#VMWonAWS']

# Get twitter access keys
consumer_key = get_config('TWITTER_CONSUMER_KEY')
consumer_secret = get_config('TWITTER_CONSUMER_SECRET')
access_token = get_config('TWITTER_ACCESS_TOKEN')
access_token_secret = get_config('TWITTER_ACCESS_SECRET')

# setup dynamodb table
session = boto3.Session(region_name='eu-central-1',
                        aws_access_key_id=get_config('AWS_ACCESS_KEY_ID'),
                        aws_secret_access_key=get_config('AWS_SECRET_ACCESS_KEY'))
ddb = session.resource('dynamodb')
table = ddb.Table('VMWonAWS')


class DynamoStreamListener(tweepy.StreamListener):
    """ A listener that continuously receives tweets and stores them in a
        DynamoDB database.
    """
    def __init__(self, api, table):
        super(tweepy.StreamListener, self).__init__()
        self.api = api
        self.table = table

    def on_status(self, status):

        data = status._json

        content = {}
        content['tweet_id'] = data['id']
        content['timestamp'] = int(data['timestamp_ms'])
        content['lang'] = data['lang']
        content['n_retweets'] = data['retweet_count']
        content['hastags'] = [
            x['text'] for x in data['entities']['hashtags'] if x['text']]
        content['user_mentions'] = [
            x['name'] for x in data['entities']['user_mentions'] if x['name']]
        content['urls'] = [x['url'] for x in data['entities']['urls'] if x['url']]
        content['text'] = data['text']
        content['user_id'] = data['user']['id']
        content['user_name'] = data['user']['name']
        content['coordinates'] = data['coordinates']

        print(content['text'] + '\n')

        try:
            self.table.put_item(Item=content)
        except Exception as e:
            print(str(e))

    def on_error(self, status_code):
        print('Encountered error with status code: {}'.format(status_code))
        return True  # Don't kill the stream

    def on_timeout(self):
        print('Timeout...')
        return True  # Don't kill the stream


def main():
    # Connect to Twitter streaming API
    auth = tweepy.OAuthHandler(consumer_key, consumer_secret)
    auth.set_access_token(access_token, access_token_secret)
    api = tweepy.API(auth)
    # Instantiate DynamoStreamListener and pass it as argument to the stream
    sapi = tweepy.streaming.Stream(auth, DynamoStreamListener(api, table))
    # Get tweets that match one of the tracked terms
    sapi.filter(track=TRACK)

if __name__ == '__main__':
    main()
Step 5 – Run the Python script
Finally, let’s run the Python script to start tracking Twitter streams.
Before you do that, you will need to install boto3 (Python SDK for AWS) and tweepy (Python library that reads and monitors Twitter APIs).
The following command should be enough to do it on a Mac: sudo pip install boto3 and sudo pip install tweepy.
Then you should be ready to run the script:
bash-3.2$ python dynamo_stream_listener.py
Depending on the hashtag popularity, you might not need to wait long for the Python script to print the results on the console and into your database.

Step 6 – Check Results in the Dynamo DB table
I went back into my DynamoDB table and as I have access to its contents, I can run queries and find that entry:

Finally, remember all of this should be free (as long as you remain under 25 GB, DynamoDB is part of the AWS Free Tier) so there’s no excuse not to have a go and test it out!
Thanks for reading.

Thanks for posting, this is interesting and overlaps with some other areas I’m looking into.
LikeLiked by 1 person