
This post will cover some caveats with regards to NSX-T segments and APIs. I will focus on VMware Cloud on AWS and Terraform but many of the comments will also apply to standard NSX-T.
Let’s go through a concrete example.
Creating a Network Segment with Terraform
Most of the Terraform for NSX-T examples I have given have been around security rules for the Distributed Firewall (DFW) or on the NSX Tier1 routers (in particular, the Edge Routers on VMC on AWS: the Compute (CGW) and Management (MGW) Gateways) but I hadn’t explained how to create networks.
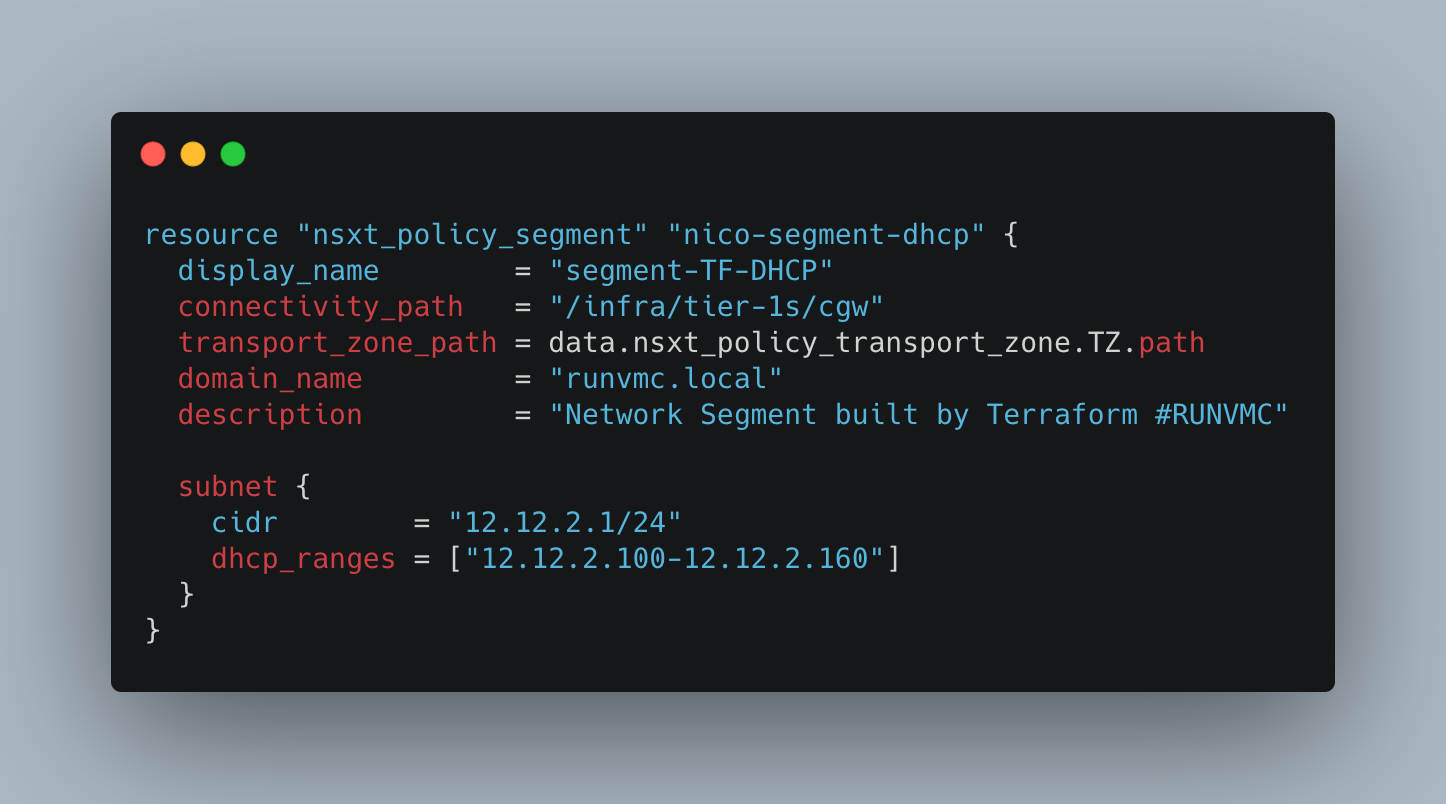
It’s pretty straight-forward. The following will create a network segment:
data "nsxt_policy_transport_zone" "TZ" {
  display_name = "vmc-overlay-tz"
}

resource "nsxt_policy_segment" "nico-segment" {
  display_name = "segment-TF"
  connectivity_path = "/infra/tier-1s/cgw"
  transport_zone_path = data.nsxt_policy_transport_zone.TZ.path
  subnet {
    cidr        = "12.12.2.1/24"
    dhcp_ranges = ["12.12.2.100-12.12.2.160"]
  }
}
Let’s review the config above. The network segments need to be attached to a NSX T1 Edge. In VMC, the choice is simple: it’s to the CGW. On-prem – make sure you specify the Tier-1 you want to attach to.
connectivity_path = "/infra/tier-1s/cgw"
If you create T1s with Terraform, you can refer directly to its path (using nsxt_policy_tier1_gateway.tier1_resource_name.path) but in VMC, there’s no such choice.
We also need to specify the transport zone (in other words, the scope of the segment and how far it reaches). In VMC, it’s fairly straight-forward. There is only one transport zone you can use – its name is “vmc-overlay-tz” – and you can’t create new ones. To refer to the path of this transport zone, you need to use the data source block below.
data "nsxt_policy_transport_zone" "TZ" {
  display_name = "vmc-overlay-tz"
}


resource "nsxt_policy_segment" "nico-segment" {
///....
  transport_zone_path = data.nsxt_policy_transport_zone.TZ.path
///....
Then in the subnet section, just specify the CIDR of the subnet. If you add the DHCP range, the network won’t be static but DHCP-enabled.
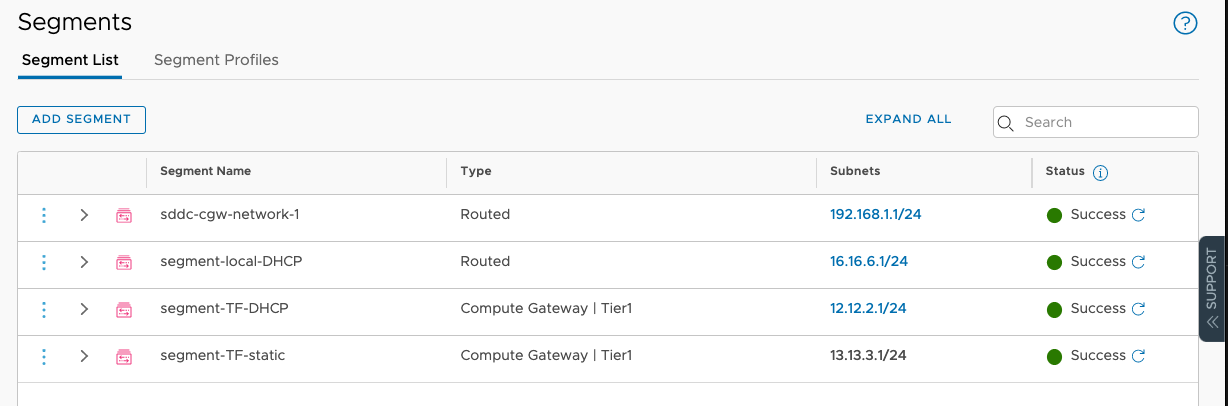
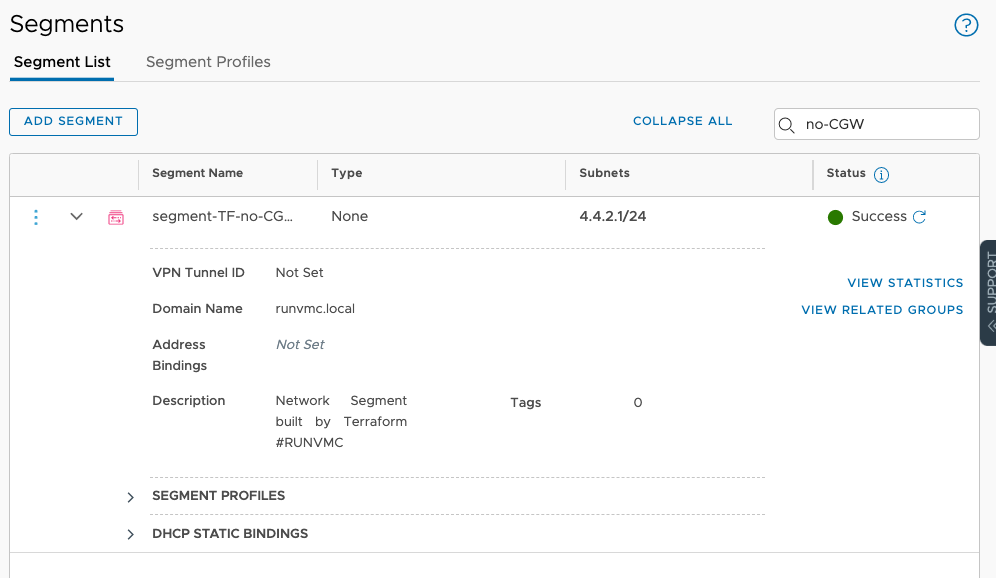
In the User Interface, my networks are created:
And my DHCP settings are correctly configured:
NSX-T Flexible Segments vs NSX-T Fixed Segments
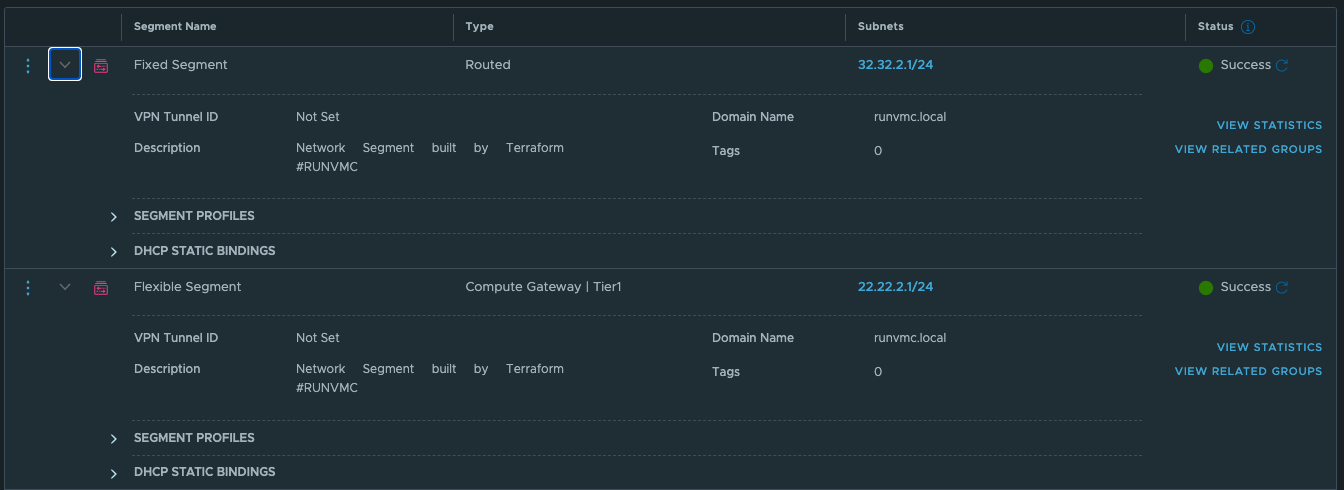
You might have noticed something in one of the earlier images:
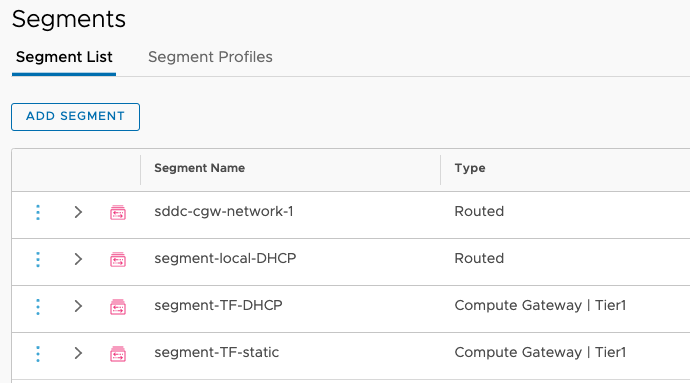
The networks created over the UI are “Routed” whereas the networks created over Terraform (and other automation tools) are “Compute Gateway | Tier1”. What’s the difference?
Well, from the VM perspective, none at all – they’re both networks attached to the CGW. However, the “Routed” ones are fixed whereas the “Compute Gateway | Tier1” segments are flexible.
It’s particularly relevant in the NSX-T world – in VMC, it’s slightly different.
A fixed segment can be deleted but not unlinked from a gateway. The fixed segments are under a Tier-1 and share the same lifecycle than the Tier-1. These segments are sub-resources of the CGW, which is why their API path is under the CGW directory:
/infra/tier-1s/cgw/segments/segment-local-DHCP
The idea is that they are created and deleted with the tier-1 itself but you cannot change their Tier-1 or cannot disconnect them etc..
Flexible segments have a lifecycle of their own. You can disconnect them from a T1 gateway for example. If you look at the API path of the “sddc-cgw-network-1”, you will see they are within the upper hierarchy “segment” directory:
/infra/segments/282e47df-bdda-40f8-b3b8-cbbf0fb66624
You can even create a segment not connected to any CGW:
resource "nsxt_policy_segment" "nico-segment-no-CGW" {
  display_name        = "segment-TF-no-CGW"
  connectivity_path   = "/infra/"
  transport_zone_path = data.nsxt_policy_transport_zone.TZ.path
  domain_name         = "runvmc.local"
  description         = "Network Segment built by Terraform #RUNVMC"

  subnet {
    cidr        = "4.4.2.1/24"
  }
}
Again on VMC, it has limited use but given that I have been asked the question on multiple occasions, it tells me it’s worth documenting for posterity or for anyone that might be confused by the different concepts
One of my customers actually wanted Terraform to create fixed segments and I asked our developers to update the Terraform provider for NSX-T. They kindly did.
We now have a new resource type, called “nsxt_policy_fixed_segment”, that will let you create a Fixed segment.
resource "nsxt_policy_fixed_segment" "nico-fixed-segment-dhcp" {
  display_name        = "Fixed Segment"
  connectivity_path   = "/infra/tier-1s/cgw"
  transport_zone_path = data.nsxt_policy_transport_zone.TZ.path
  domain_name         = "runvmc.local"
  description         = "Network Segment built by Terraform #RUNVMC"

  subnet {
    cidr        = "32.32.2.1/24"
    dhcp_ranges = ["32.32.2.100-32.32.2.180"]
  }
}
Let’s have a look:
$ terraform init

Initializing the backend...

Initializing provider plugins...
- Finding latest version of vmware/nsxt...
- Installing vmware/nsxt v3.1.1...
- Installed vmware/nsxt v3.1.1 (signed by a HashiCorp partner, key ID 6B6B0F38607A2264)

Partner and community providers are signed by their developers.
If you'd like to know more about provider signing, you can read about it here:
https://www.terraform.io/docs/plugins/signing.html

Terraform has created a lock file .terraform.lock.hcl to record the provider
selections it made above. Include this file in your version control repository
so that Terraform can guarantee to make the same selections by default when
you run "terraform init" in the future.

Terraform has been successfully initialized!

You may now begin working with Terraform. Try running "terraform plan" to see
any changes that are required for your infrastructure. All Terraform commands
should now work.

If you ever set or change modules or backend configuration for Terraform,
rerun this command to reinitialize your working directory. If you forget, other
commands will detect it and remind you to do so if necessary.
When you run a “terraform plan”:
$ terraform plan

An execution plan has been generated and is shown below.
Resource actions are indicated with the following symbols:
  + create

Terraform will perform the following actions:

  # nsxt_policy_fixed_segment.nico-fixed-segment-dhcp will be created
  + resource "nsxt_policy_fixed_segment" "nico-fixed-segment-dhcp" {
      + connectivity_path   = "/infra/tier-1s/cgw"
      + description         = "Network Segment built by Terraform #RUNVMC"
      + display_name        = "changed description"
      + domain_name         = "runvmc.local"
      + id                  = (known after apply)
      + nsx_id              = (known after apply)
      + overlay_id          = (known after apply)
      + path                = (known after apply)
      + revision            = (known after apply)
      + transport_zone_path = "/infra/sites/default/enforcement-points/vmc-enforcementpoint/transport-zones/86624b02-2f96-4a35-801f-fdbebf50acd2"

      + subnet {
          + cidr        = "32.32.2.1/24"
          + dhcp_ranges = [
              + "32.32.2.100-32.32.2.180",
            ]
          + network     = (known after apply)
        }
    }

  # nsxt_policy_segment.nico-segment-dhcp will be created
  + resource "nsxt_policy_segment" "nico-segment-dhcp" {
      + connectivity_path   = "/infra/tier-1s/cgw"
      + description         = "Network Segment built by Terraform #RUNVMC"
      + display_name        = "description"
      + domain_name         = "runvmc.local"
      + id                  = (known after apply)
      + nsx_id              = (known after apply)
      + overlay_id          = (known after apply)
      + path                = (known after apply)
      + revision            = (known after apply)
      + transport_zone_path = "/infra/sites/default/enforcement-points/vmc-enforcementpoint/transport-zones/86624b02-2f96-4a35-801f-fdbebf50acd2"

      + subnet {
          + cidr        = "22.22.2.1/24"
          + dhcp_ranges = [
              + "22.22.2.100-22.22.2.160",
            ]
          + network     = (known after apply)
        }
    }

Plan: 2 to add, 0 to change, 0 to destroy.

------------------------------------------------------------------------

Note: You didn't specify an "-out" parameter to save this plan, so Terraform
can't guarantee that exactly these actions will be performed if
"terraform apply" is subsequently run.
You can see both networks being created:
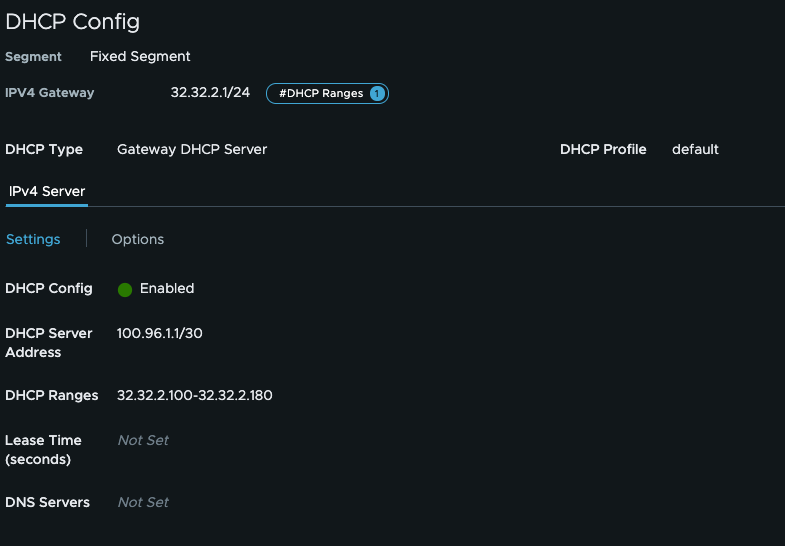
And the DHCP config is built as expected:
And the full video is here:
Thanks for reading.
