
This post will focus on using the Infrastructure-As-Code tool HashiCorp Packer and how it works with VMware and a concrete example with VMware Cloud on AWS.
Kudos to Cody De Arkland for his excellent blog on this topic (Cody has so much good stuff on his blog). I also consulted this post, this post, the GitHub Jetbrains page and the official Packer page.
As always, my inspiration for my posts is always from conversations with customers, colleagues or partners. In this case, it’s a customer currently evaluating VMware Cloud on AWS to host a Microsoft SQL farm.
This customer wants to automate everything and he asked me if he could use tools such as HashiCorp Terraform, Powershell and HashiCorp Packer with their VMware Cloud on AWS environment. They would like to avoid using the GUI as much as possible.
The first two tools – I have used a fair bit and I know what works (and what doesn’t) on VMware Cloud on AWS.
The third one: I had never used it before but I liked the challenge of testing it out.
What is Packer?
Packer is an Infrastructure-As-Code platform to automate and standardize the creation of virtual machines across various formats (vSphere, Amazon EC2, Hyper-V/Azure, VirtualBox, etc…).
To start with, we need to define a template configuration that describes the characteristics of the VM, such as:
- the ISO it’s created from,
- the network it’s attached to,
- vCPU and RAM,
- vCenter, host, datastore, cluster and folder it will be deployed on.
This template configuration is written in JSON and we will see an example shortly.
Once you have this template built, simply push the machine build with a simple command (packer build template.json) and your VM will be created. Packer works on Windows, Linux or MacOs.
You can obviously treat that JSON template as a code and benefit from the well-known benefits of IaC (agility, consistency, automation, etc…)
Packer has some terminology worth understanding:
Artifactsare the results of a build. For the VMware builder, the artifact is a directory of files comprising the created virtual machine. Our artifact will host a ubuntu VM.Buildersare components of Packer that are able to create a machine image for a single platform. Example builders include VMware, and Amazon EC2. Builders can be created and added to Packer in the form of plugins. We will use the VMware builder and a plugin called jetbrains.Commandsare sub-commands for the packer program that perform some job. An example command is “build”, which is invoked as packer build. In the notes below, you will see we use packer build.Templatesare JSON files which define one or more builds by configuring the various components of Packer. Packer is able to read a template and use that information to create a machine. In our example, we use “ubuntu-18.04.json” as our template.
Packer In Action
So in concrete terms, let’s have a look at the template we’re going to use:
{
  "builders": [
    {
      "type": "vsphere-iso",

      "vcenter_server":      "vcenter.sddc-A-B-C-D.vmwarevmc.com",
      "username":            "cloudadmin@vmc.local",
      "password":            "XXXXXXXXXXXXXX",
      "insecure_connection": "true",

      "vm_name": "ubuntu-runVMC",
      "datastore":"WorkloadDatastore",
      "folder": "Workloads",
      "cluster": "Cluster-1",
      "network": "sddc-cgw-network-1",
      "ssh_username": "jetbrains",
      "ssh_password": "jetbrains",
      "guest_os_type": "ubuntu64Guest",
      "CPUs":             2,
      "RAM":              4096,
      "RAM_reserve_all": true,

      "disk_controller_type":  "pvscsi",
      "disk_size":        32768,
      "disk_thin_provisioned": true,

      "network_card": "vmxnet3",

      "iso_paths": [
        "[WorkloadDatastore] ISO/ubuntu-18.04.2-server-amd64.iso"
      ],

      "floppy_files": [
        "./preseed.cfg"
      ],
      "boot_command": [
        "",
        "",
        "",
        "",
        "",
        "",
        "",
        "",
        "",
        "",
        "/install/vmlinuz",
        " initrd=/install/initrd.gz",
        " priority=critical",
        " locale=en_US",
        " file=/media/preseed.cfg",
        ""
      ]
    }
  ],

  "provisioners": [
    {
      "type": "shell",
      "inline": ["ls /"]
    }
  ]
}
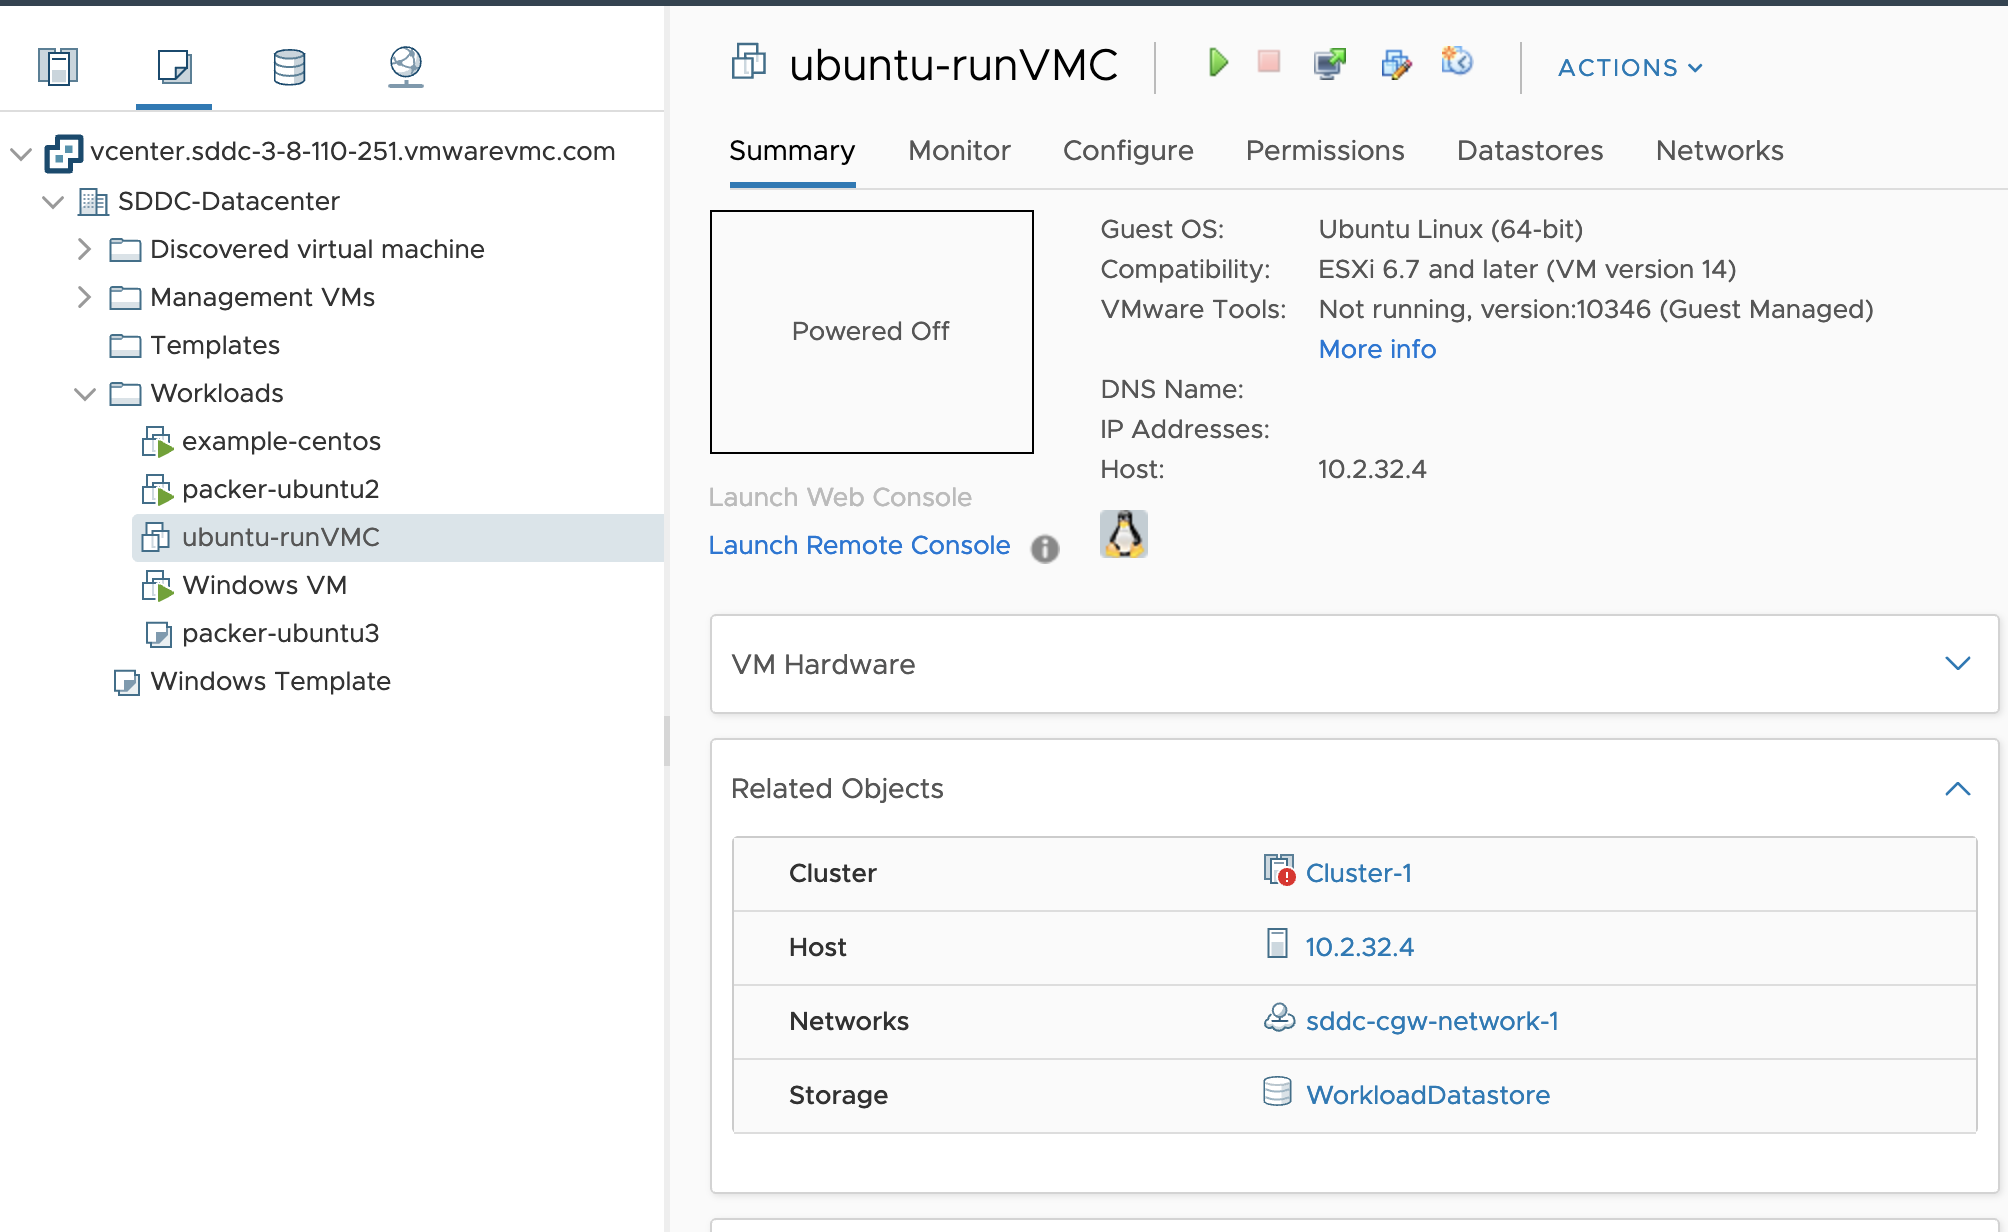
So what are we trying to do here? The VM created by the template above will have the following characteristics:
- The VM will be deployed in the vCenter vcenter.sddc-A-B-C-D.vmwarevmc.com (mine runs in the cloud but it could be anywhere),
- It will be called “ubuntu-runVMC”.
- It will be deployed in the “WorkloadDatastore” datastore (that’s the only one we can deploy VMs in the VMware Cloud on AWS vCenter), in the folder “Workloads” and in the “Cluster-1” (the name of the default cluster on VMC).
- It will be attached to “sddc-cgw-network-1” which a DHCP-enabled network in my VMware Cloud environment.
- It will have 2 vCPUs and 4G of RAM.
- It will boot from an ISO which I uploaded previously to my datastore: this ISO is in the WorkloadDataStore/ISO folder. Make sure you get the iso_paths right and point to the right location, otherwise you will waste 24 hours of your precious and hopefully not-too-short life troubleshooting like I did.

- It will run a set of commands at boot time (specified in the preseed.cfg file). I used the preseed.cfg file from the GitHub repo of Jetbrains but obviously you might want to adapt accordingly.
Best practices would be to create a separate file with variables (password credentials for example) and remove the variables from the JSON build template but to keep it simple, I put my variables in the JSON itself.
Caveats for VMware Cloud on AWS
Restrictive Model
Remember that VMC on AWS is a managed service. All our customers get a standard template configuration (based on best practices) and close-to-admin credentials to be able to operate a VMware environment without having to worry about some of the nerdy knobs.
This means you don’t have root access to the ESXi hosts. The reason I mention this is that Packer by default would require root ESXi host.
However the Packer plugin Jetbrains lets you access the vCenter APIs directly and therefore Jetbrains enable Packer users to consume the VMware Cloud vCenter.
The “vsphere-iso” builder in the template above actually refers to the fact we are using Jetbrains.
On a similar note, make sure you select the WorkloadDatastore as it’s the only datastore where we can deploy VMs in VMware Cloud on AWS.
It’s in the Cloud !
During the provisioning phase, the client launching the ‘packer build’ command needs to SSH to the deployed VM.
Make sure the Packer client has IP connectivity to the deployed VM, otherwise SSH will fail and the provisioning will fail.
Detailed Deployment
This is what happens when you go ahead and create a VM. It took about 4 minutes from start to finish (the following video shows what it looks like).
C:\Users\bob>packer build ubuntu-18.04-runvmc.json vsphere-iso output will be in this color.==> vsphere-iso: Creating VM… ==> vsphere-iso: Customizing hardware… ==> vsphere-iso: Mount ISO images… ==> vsphere-iso: Creating floppy disk… vsphere-iso: Copying files flatly from floppy_files vsphere-iso: Copying file: ./preseed.cfg vsphere-iso: Done copying files from floppy_files vsphere-iso: Collecting paths from floppy_dirs vsphere-iso: Resulting paths from floppy_dirs : [] vsphere-iso: Done copying paths from floppy_dirs ==> vsphere-iso: Uploading created floppy image ==> vsphere-iso: Adding generated Floppy… ==> vsphere-iso: Set boot order temporary… ==> vsphere-iso: Power on VM… ==> vsphere-iso: Waiting 10s for boot… ==> vsphere-iso: Typing boot command… ==> vsphere-iso: Waiting for IP… ==> vsphere-iso: IP address: 192.168.1.130 ==> vsphere-iso: Using ssh communicator to connect: 192.168.1.130 ==> vsphere-iso: Waiting for SSH to become available… ==> vsphere-iso: Connected to SSH! ==> vsphere-iso: Provisioning with shell script: C:\Users\bob\AppData\Local\Temp\packer-shell834750743 vsphere-iso: bin vsphere-iso: boot vsphere-iso: dev vsphere-iso: etc vsphere-iso: home vsphere-iso: initrd.img vsphere-iso: initrd.img.old vsphere-iso: lib vsphere-iso: lib64 vsphere-iso: lost+found vsphere-iso: media vsphere-iso: mnt vsphere-iso: opt vsphere-iso: proc vsphere-iso: root vsphere-iso: run vsphere-iso: sbin vsphere-iso: srv vsphere-iso: swapfile vsphere-iso: sys vsphere-iso: tmp vsphere-iso: usr vsphere-iso: var vsphere-iso: vmlinuz vsphere-iso: vmlinuz.old ==> vsphere-iso: Shut down VM… ==> vsphere-iso: Deleting Floppy drives… ==> vsphere-iso: Deleting Floppy image… ==> vsphere-iso: Eject CD-ROM drives… ==> vsphere-iso: Clear boot order… Build 'vsphere-iso' finished.==> Builds finished. The artifacts of successful builds are: --> vsphere-iso: ubuntu-runVMC
Video Walkthrough
Result:
The VM has been created and is attached to the network we specified and deployed in the expected cluster and datastore. How cool is that?
Where do I start?
- Download Packer for your platform
- Download Jetbrains
- Download the ISO you want to build the VM from and upload to WorkloadDatastore/ISO (create an ISO folder in the WorkloadDatastore). If you want to follow my example, download the Ubuntu ISO.
- Download ubuntu-18.04-working template.json and preseed.cfg from my Github repo.
- Update the JSON file above with the right credentials and other settings, such as Network segment you want the VM to be attached.
- Run the following command:
packer build ubuntu-18.04-working template.json
And watch the VM being created! That’s it.
Thanks for reading!

Why have you used preseed.cfg when you configure the same in provisioners? Is there any specific reason and advantage ?
LikeLike