
This is my first of (I suspect) many blog posts related to cloud-native workloads and Kubernetes. I’m bound to make mistakes or describe things incorrectly – please Tweet at me or put up a comment below if you spot inaccuracies or mistakes – but I’ve found that the best way for me to learn is to document my learnings in a blog post.
You will see I walk through a number of basic Kubernetes concepts through the post (mainly for my own benefit!).
VMware Tanzu Mission Control is part of the VMware Tanzu porfolio of applications that focus on cloud native applications.
Tanzu Mission Control (TMC) focuses on management of Kubernetes cluster across any underlying infrastructure or Cloud. The concept behind Tanzu Mission Control is to manage the explosion of Kubernetes clusters across any clouds and environments and to provide a management plane across all clusters.
TMC was actually being built at Heptio before it was acquired (Heptio was co-founded by two of the Kubernetes co-founders: Craig McLuckie and Joe Beda).
Tanzu Mission Control is a SaaS-based platform and this post will go through a brief walkthrough on how to set this up. There are tons of features in TMC like policing, security and policing but I won’t look into this in this post.
What you will see below is how easy it was to set up. It took me about 10 minutes to monitor my Kubernetes cluster running on my Mac (using Docker Desktop).
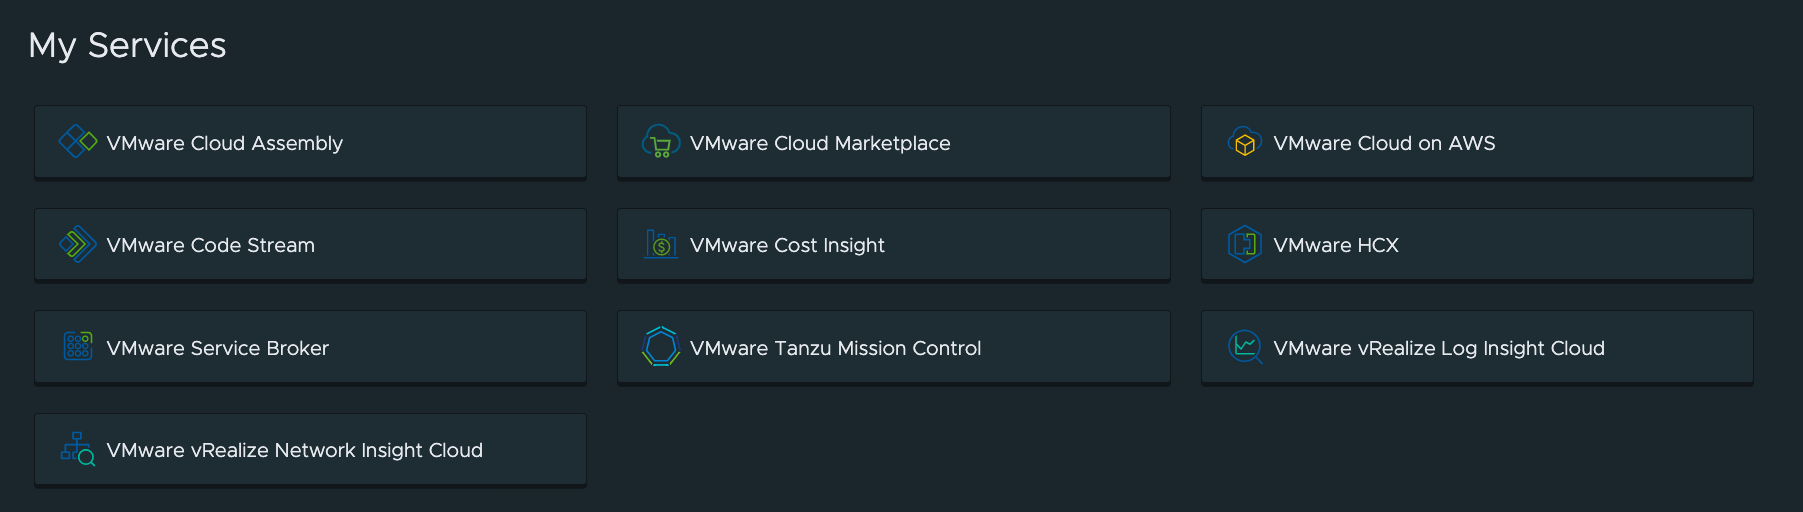
TMC is one of the VMware Cloud Services and you would access them via the VMware Cloud Console.
When you log on to Tanzu Mission Control, one of the first things you might want to do is to attach your Kubernetes cluster a cluster group:
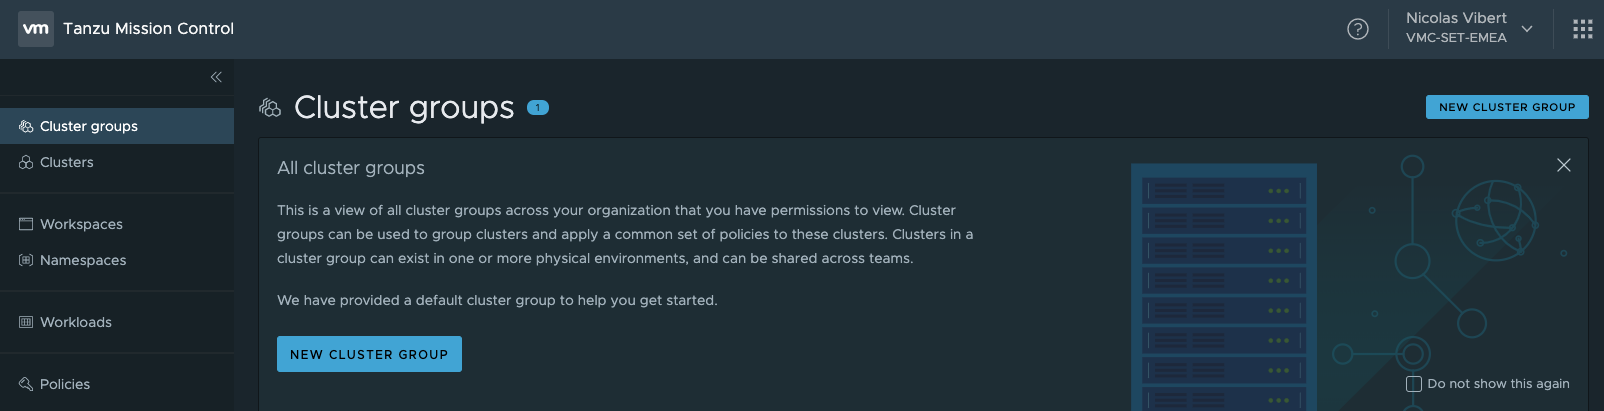
As described in the picture above, Cluster Groups simply provides a different level of abstraction: cluster groups abstract multiple Kubernetes clusters across single, multi or hybrid-cloud environments to simplify their creation, management and operation. You might have a cluster group for prod, one for test, one for staging/Q&A, etc…
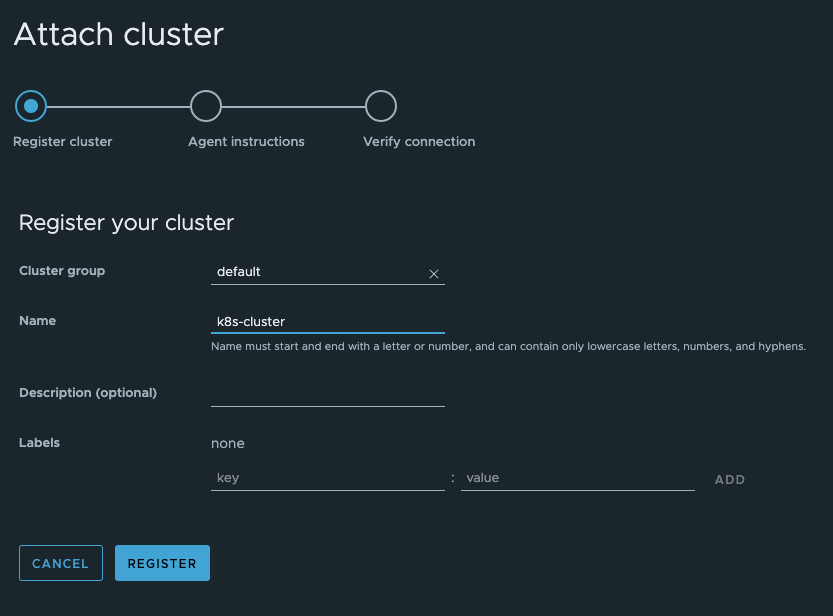
There is a default cluster group (originally called ‘default’). When you add a cluster to it, you can specify its name, description and labels:
Once that’s done, we get some instructions on how to install the Tanzu Mission Control agent. That’s installed using K8S itself, with “kubernetes apply”. This will actually create the agent in its own namespace vmware-system-tmc.

On my laptop, I’m running Docker Desktop. It has native Kubernetes desktop, which can be enabled in a couple of clicks (Go to Preferences) and tick ‘Enable Kubernetes’.

On my K8S cluster, I’m creating resources using the standard code specified there and using the command “kubectl apply”:
nvibert-a01:~ nicolasvibert$ kubectl apply -f https://k8s.io/examples/controllers/nginx-deployment.yaml
deployment.apps/nginx-deployment configured
nvibert-a01:~ nicolasvibert$ kubectl get pods
NAME                                READY   STATUS              RESTARTS   AGE
nginx-deployment-5754944d6c-lm96x   1/1     Running             0          2s
nginx-deployment-5754944d6c-w8gwt   1/1     Running             0          7d19h
nginx-deployment-5754944d6c-wzd6b   1/1     Running             0          7d19h
What are we creating with this command? Let’s have a look at this nginx-deployment.yaml file:
apiVersion: apps/v1
kind: Deployment
metadata:
  name: nginx-deployment
  labels:
    app: nginx
spec:
  replicas: 3
  selector:
    matchLabels:
      app: nginx
  template:
    metadata:
      labels:
        app: nginx
    spec:
      containers:
      - name: nginx
        image: nginx:1.7.9
        ports:
        - containerPort: 80
In this example, we are creating the following:
- A Deployment named
nginx-deploymentis created, indicated by the.metadata.namefield. - The Deployment creates three replicated Pods, indicated by the
replicasfield. You will see below 3 pods, starting with nginx-deployment. That’s 3 containers (there is commonly 1 container per pod). - The
templatefield contains the following sub-fields:- The Pods are labeled
app: nginxusing thelabelsfield. - The Pod template’s specification, or
.template.specfield, indicates that the Pods run one container,nginx, which runs thenginxDocker Hub image at version 1.7.9. - Create one container and name it
nginxusing thenamefield.
- The Pods are labeled
After a few minutes, all the pods are running successfully:
nvibert-a01:~ nicolasvibert$ kubectl get pods
NAME                                READY   STATUS    RESTARTS   AGE
[...]
nginx-deployment-5754944d6c-6k75q   1/1     Running   0          6s
nginx-deployment-5754944d6c-89fnz   1/1     Running   0          6s
nginx-deployment-5754944d6c-f6q8g   1/1     Running   0          6s
[...]
Let’s deploy the TMC agent using the command highlighted previously. You can see we create a namespace ‘vmware-system-tmc‘, secrets and roles and some other obscure things I haven’t even begun to understand.
nvibert-a01:~ nicolasvibert$ kubectl apply -f 'https://vmcsetemea.tmc.cloud.vmware.com/installer?cc5deaa0dd6af7f2'
namespace/vmware-system-tmc created
configmap/stack-config created
secret/tmc-client-secret created
customresourcedefinition.apiextensions.k8s.io/agents.clusters.tmc.cloud.vmware.com created
customresourcedefinition.apiextensions.k8s.io/extensions.clusters.tmc.cloud.vmware.com created
serviceaccount/extension-manager created
clusterrole.rbac.authorization.k8s.io/extension-manager-role created
clusterrolebinding.rbac.authorization.k8s.io/extension-manager-rolebinding created
service/extension-manager-service created
deployment.apps/extension-manager created
serviceaccount/extension-updater-serviceaccount created
clusterrole.rbac.authorization.k8s.io/extension-updater-clusterrole created
clusterrolebinding.rbac.authorization.k8s.io/extension-updater-clusterrolebinding created
service/extension-updater created
deployment.apps/extension-updater created
serviceaccount/agent-updater created
clusterrole.rbac.authorization.k8s.io/agent-updater-role created
clusterrolebinding.rbac.authorization.k8s.io/agent-updater-rolebinding created
deployment.apps/agent-updater created
cronjob.batch/agentupdater-workload created
Kubernetes has the concept of ‘namespaces’ – in “VMware” terms, I would associate it to a “resource pool”. In ‘networking’ terms, I would associate it to a ‘virtual context’ or ‘virtual routing table’.
nvibert-a01:~ nicolasvibert$ kubectl get namespaces
NAME                STATUS   AGE
default             Active   7d23h
docker              Active   7d23h
kube-node-lease     Active   7d23h
kube-public         Active   7d23h
kube-system         Active   7d23h
vmware-system-tmc   Active   47s
By default when you spin up a deployment, the pods will be deployed in the ‘default‘ namespace.
If you want to look at the pods deployed in a different namespace, you need to specify the namespace with ‘-n‘.
The output below will be identical:
nvibert-a01:~ nicolasvibert$ kubectl get pods -n default
NAME                                READY   STATUS    RESTARTS   AGE
nginx-7bb7cd8db5-hxx9c              1/1     Running   0          7d22h
nginx-deployment-5754944d6c-lm96x   1/1     Running   0          3h35m
nginx-deployment-5754944d6c-w8gwt   1/1     Running   0          7d22h
nginx-deployment-5754944d6c-wzd6b   1/1     Running   0          7d22h
[...]
nvibert-a01:~ nicolasvibert$ kubectl get pods
NAME                                READY   STATUS    RESTARTS   AGE
nginx-7bb7cd8db5-hxx9c              1/1     Running   0          7d22h
nginx-deployment-5754944d6c-lm96x   1/1     Running   0          3h35m
nginx-deployment-5754944d6c-w8gwt   1/1     Running   0          7d22h
nginx-deployment-5754944d6c-wzd6b   1/1     Running   0          7d22h
[...]
When I first looked at the status on the TMC console, I had issues connecting so I wanted to do some troubleshooting. The following command showed me that I had a ‘ImagePullBackOff‘ error.
nvibert-a01:~ nicolasvibert$ kubectl get pods -n  vmware-system-tmc
NAME                                       READY   STATUS              RESTARTS   AGE
agent-updater-7b47bd5d65-nq87p             1/1     Running             0          4m41s
agentupdater-workload-1584101400-klm8s     0/1     Completed           0          18s
cluster-health-extension-6999fbdff-vclm4   0/1     ContainerCreating   0          49s
data-protection-5b94df79f4-tdcws           0/1     ContainerCreating   0          46s
extension-manager-77c5bb9f89-9k2m4         1/1     Running             0          4m41s
extension-updater-8b464c8cf-zxrx5          1/1     Running             0          4m41s
inspection-extension-6dbd8674fb-lll24      0/1     ImagePullBackOff    0          49s
intent-agent-68bf74f8ff-md4x2              0/1     ContainerCreating   0          42s
policy-sync-extension-54fdccd7bb-k72dc     0/1     Init:0/1            0          39s
policy-webhook-64866489bd-d5cf9            0/1     ContainerCreating   0          38s
policy-webhook-64866489bd-ljfnt            0/1     ContainerCreating   0          38s
sync-agent-886594f4c-drgft                 0/1     ContainerCreating   0          49s
I ran the ‘kubectl describe‘ command, specifying the appropriate namespace and the name of the pod with the error, to see if I could get more details about what was causing the issue:
nvibert-a01:~ nicolasvibert$ kubectl describe pods -n vmware-system-tmc pod inspection-extension-6dbd8674fb-lll24
Name:           inspection-extension-6dbd8674fb-lll24
Namespace:      vmware-system-tmc
Priority:       0
Node:           docker-desktop/192.168.65.3
Start Time:     Fri, 13 Mar 2020 12:09:29 +0000
Labels:         app=inspection-extension
                control-plane=controller-manager
                controller-tools.k8s.io=1.0
                pod-template-hash=6dbd8674fb
Annotations:    <none>
Status:         Pending
IP:             10.1.0.111
Controlled By:  ReplicaSet/inspection-extension-6dbd8674fb
Containers:
  manager:
    Container ID:
    Image:         vmware-docker-olympus-extensions.bintray.io/inspection-extension/manager@sha256:171d99ea21d1bfe11a07aebc466f6dddde61e1ffa226f5a29de200ac3e1ffa0b
    Image ID:
    Port:          <none>
    Host Port:     <none>
    Args:
      --namespace=$(POD_NAMESPACE)
    State:          Waiting
      Reason:       ImagePullBackOff
    Ready:          False
    Restart Count:  0
    Limits:
      cpu:     500m
      memory:  256Mi
    Requests:
      cpu:     10m
      memory:  128Mi
    Environment Variables from:
      uploader-image  ConfigMap  Optional: false
    Environment:
      POD_NAMESPACE:  vmware-system-tmc (v1:metadata.namespace)
    Mounts:
      /var/run/secrets/kubernetes.io/serviceaccount from sonobuoy-serviceaccount-token-78svb (ro)
Conditions:
  Type              Status
  Initialized       True
  Ready             False
  ContainersReady   False
  PodScheduled      True
Volumes:
  sonobuoy-serviceaccount-token-78svb:
    Type:        Secret (a volume populated by a Secret)
    SecretName:  sonobuoy-serviceaccount-token-78svb
    Optional:    false
QoS Class:       Burstable
Node-Selectors:  <none>
Tolerations:     node.kubernetes.io/not-ready:NoExecute for 300s
                 node.kubernetes.io/unreachable:NoExecute for 300s
Events:
  Type     Reason     Age                 From                     Message
  ----     ------     ----                ----                     -------
  Normal   Scheduled  2m9s                default-scheduler        Successfully assigned vmware-system-tmc/inspection-extension-6dbd8674fb-lll24 to docker-desktop
  Warning  Failed     113s                kubelet, docker-desktop  Failed to pull image "vmware-docker-olympus-extensions.bintray.io/inspection-extension/manager@sha256:171d99ea21d1bfe11a07aebc466f6dddde61e1ffa226f5a29de200ac3e1ffa0b": rpc error: code = Unknown desc = Error response from daemon: Get https://vmware-docker-olympus-extensions.bintray.io/v2/: net/http: request canceled (Client.Timeout exceeded while awaiting headers)
  Warning  Failed     113s                kubelet, docker-desktop  Error: ErrImagePull
  Normal   BackOff    113s                kubelet, docker-desktop  Back-off pulling image "vmware-docker-olympus-extensions.bintray.io/inspection-extension/manager@sha256:171d99ea21d1bfe11a07aebc466f6dddde61e1ffa226f5a29de200ac3e1ffa0b"
  Warning  Failed     113s                kubelet, docker-desktop  Error: ImagePullBackOff
  Normal   Pulling    99s (x2 over 2m8s)  kubelet, docker-desktop  Pulling image "vmware-docker-olympus-extensions.bintray.io/inspection-extension/manager@sha256:171d99ea21d1bfe11a07aebc466f6dddde61e1ffa226f5a29de200ac3e1ffa0b"
Error from server (NotFound): pods "pod" not found
The events at the end highlights had some network connection issues pulling the Docker image.
After waiting a bit longer and some retries, the image was eventually successfully pulled, the Docker container created and the pod running without any issues:
nvibert-a01:~ nicolasvibert$ kubectl describe pods -n vmware-system-tmc pod inspection-extension-6dbd8674fb-lll24
Name:           inspection-extension-6dbd8674fb-lll24
Namespace:      vmware-system-tmc
Priority:       0
Node:           docker-desktop/192.168.65.3
Start Time:     Fri, 13 Mar 2020 12:09:29 +0000
Labels:         app=inspection-extension
                control-plane=controller-manager
                controller-tools.k8s.io=1.0
                pod-template-hash=6dbd8674fb
Annotations:    <none>
Status:         Running
IP:             10.1.0.111
Controlled By:  ReplicaSet/inspection-extension-6dbd8674fb
Containers:
  manager:
    Container ID:  docker://341072fa0d955aa55cfd0271b5fae39fab21a0d02bf1a940f8ae82aac433ac8e
    Image:         vmware-docker-olympus-extensions.bintray.io/inspection-extension/manager@sha256:171d99ea21d1bfe11a07aebc466f6dddde61e1ffa226f5a29de200ac3e1ffa0b
    Image ID:      docker-pullable://vmware-docker-olympus-extensions.bintray.io/inspection-extension/manager@sha256:171d99ea21d1bfe11a07aebc466f6dddde61e1ffa226f5a29de200ac3e1ffa0b
    Port:          <none>
    Host Port:     <none>
    Args:
      --namespace=$(POD_NAMESPACE)
    State:          Running
      Started:      Fri, 13 Mar 2020 12:11:58 +0000
    Ready:          True
    Restart Count:  0
    Limits:
      cpu:     500m
      memory:  256Mi
    Requests:
      cpu:     10m
      memory:  128Mi
    Environment Variables from:
      uploader-image  ConfigMap  Optional: false
    Environment:
      POD_NAMESPACE:  vmware-system-tmc (v1:metadata.namespace)
    Mounts:
      /var/run/secrets/kubernetes.io/serviceaccount from sonobuoy-serviceaccount-token-78svb (ro)
Conditions:
  Type              Status
  Initialized       True
  Ready             True
  ContainersReady   True
  PodScheduled      True
Volumes:
  sonobuoy-serviceaccount-token-78svb:
    Type:        Secret (a volume populated by a Secret)
    SecretName:  sonobuoy-serviceaccount-token-78svb
    Optional:    false
QoS Class:       Burstable
Node-Selectors:  <none>
Tolerations:     node.kubernetes.io/not-ready:NoExecute for 300s
                 node.kubernetes.io/unreachable:NoExecute for 300s
Events:
  Type    Reason                Age                 From        Message
  ----    ------                ----                ----        -------
  Normal  SonobuoyScanProgress  55s (x66 over 66m)  inspection  status: running, plugin: (e2e, running, )
Error from server (NotFound): pods "pod" not found
Once I waited long enough, everything came up fine.
nvibert-a01:~ nicolasvibert$ kubectl get pods -n  vmware-system-tmc
NAME                                       READY   STATUS              RESTARTS   AGE
agent-updater-7b47bd5d65-nq87p             1/1     Running             0          6m26s
agentupdater-workload-1584101460-s8mjz     0/1     Completed           0          63s
agentupdater-workload-1584101520-sgvtw     1/1     Running             0          3s
cluster-health-extension-6999fbdff-vclm4   1/1     Running             0          2m34s
data-protection-5b94df79f4-tdcws           1/1     Running             0          2m31s
extension-manager-77c5bb9f89-9k2m4         1/1     Running             0          6m26s
extension-updater-8b464c8cf-zxrx5          1/1     Running             0          6m26s
inspection-extension-6dbd8674fb-lll24      1/1     Running             0          2m34s
intent-agent-68bf74f8ff-md4x2              1/1     Running             0          2m27s
policy-sync-extension-54fdccd7bb-k72dc     0/1     PodInitializing     0          2m24s
policy-webhook-64866489bd-d5cf9            0/1     ContainerCreating   0          2m23s
policy-webhook-64866489bd-ljfnt            0/1     ContainerCreating   0          2m23s
sync-agent-886594f4c-drgft                 1/1     Running             0          2m34s
nvibert-a01:~ nicolasvibert$
nvibert-a01:~ nicolasvibert$ kubectl get pods -n  vmware-system-tmc
NAME                                       READY   STATUS      RESTARTS   AGE
agent-updater-7b47bd5d65-nq87p             1/1     Running     0          99m
agentupdater-workload-1584107040-272lf     0/1     Completed   0          55s
cluster-health-extension-6999fbdff-vclm4   1/1     Running     0          95m
data-protection-5b94df79f4-tdcws           1/1     Running     0          95m
extension-manager-77c5bb9f89-9k2m4         1/1     Running     0          99m
extension-updater-8b464c8cf-zxrx5          1/1     Running     0          99m
inspection-extension-6dbd8674fb-lll24      1/1     Running     0          95m
intent-agent-68bf74f8ff-md4x2              1/1     Running     0          95m
policy-sync-extension-54fdccd7bb-k72dc     1/1     Running     0          95m
policy-webhook-64866489bd-d5cf9            1/1     Running     0          95m
policy-webhook-64866489bd-ljfnt            1/1     Running     0          95m
sync-agent-886594f4c-drgft                 1/1     Running     0          95m
Once I go back to the TMC console, I can see my Cluster attached:

I can see all the Namespaces populated:

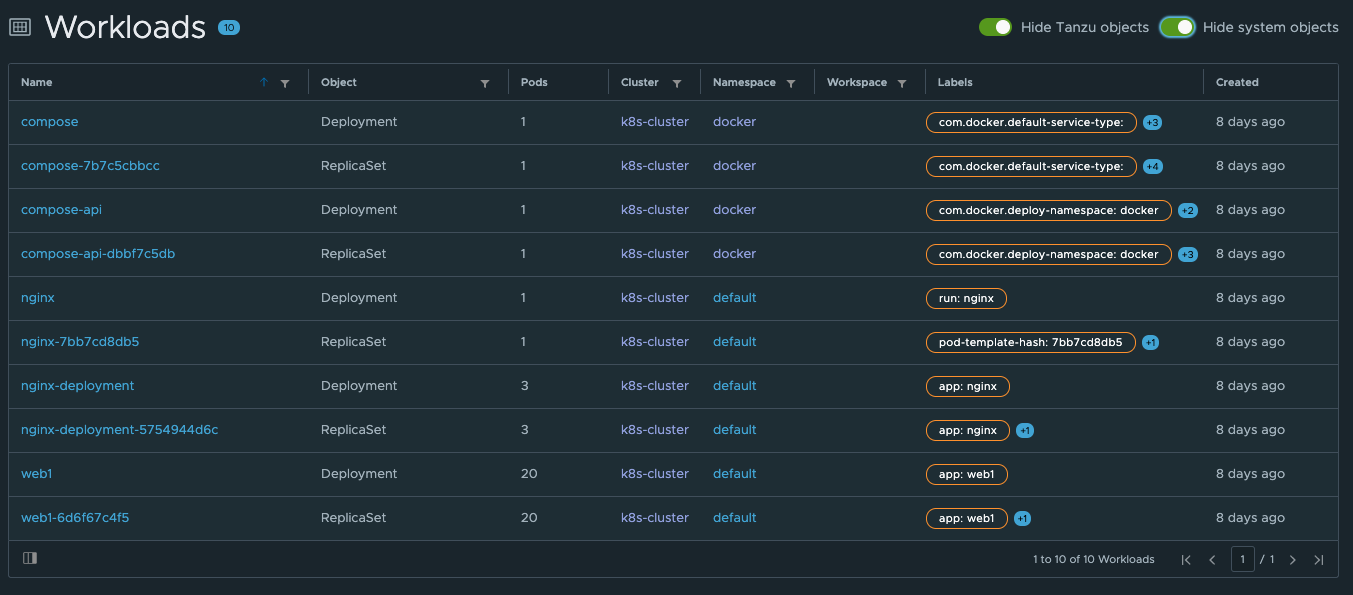
You can visualize the workloads and all the deployments I have created. I recommend you hide Tanzu and System objects to focus on your applications.
I can see the number of nodes – as I am using Docker Desktop on my Mac, it only supports a single node:
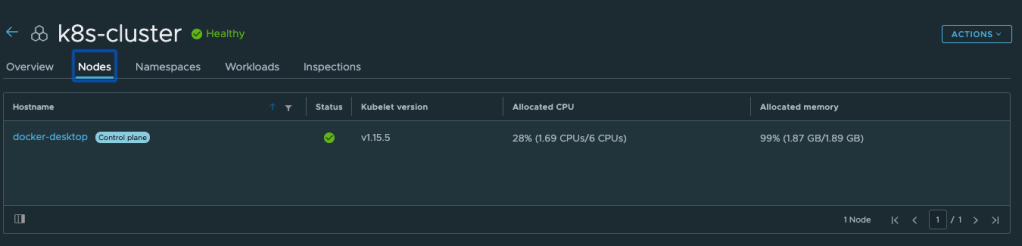
I can also see I’m almost going over my allocated memory!

But TMC is more about multi-cluster management so I thought I would start monitoring the VMware Tanzu Kubernetes Grid we have running in our VMware Cloud on AWS SDDC. Again, it was straight-forward to add my TKG Cluster to my Cluster Group using the user interface above: I simply had to deploy the agent with:
kubectl apply -f 'https://vmcsetemea.tmc.cloud.vmware.com/installer?XXXXXXXXX'
And in minutes, it came up in my TMC portal:


I am barely scratching the surface as there are many more things I would like to explore like access, image registry and security policies but one step at a time!
For more info, read Oren’s great post here.
Thanks for reading.
