
Now that we’ve established in Part 1 the concept and the use case of Consul-Terraform-Sync, let’s work out how to actually build a module.
If you check out the Terraform Registry and search for NIA, you will see all the modules that have been built for this Network-Infrastructure-Automation framework and the supported vendors.
What the modules do is essentially taking the values from the services created in Consul and mapping them to Terraform Configuration. The CTS daemon will execute Terraform and create the network and security configurations accordingly.
All modules follow a similar logic but are different enough that it warrants an explanation on how they work and how to build a new one. The module to build an AWS ELB Pool will differ from a module to build a security rule.
One of my customers wanted to update objects in his Fortinet firewall ruleset. As there was no CTS Fortinet module available yet, I took a shot at building a simple one.
The good thing is that the docs are pretty good and there’s a template repo for you to use. This tutorial on Learn@HashiCorp is also a great starting point.
Anatomy of a CTS Module
What we want CTS to do is automatically go and create a network entity from a service configured in Consul.
As you can see in the sample repo, the only files you need (outside of the module documentations) are two files.
First, you will find a standard Terraform file called “variables.tf” with the following field:
variable "services" {
  description = "Consul services monitored by Consul-Terraform-Sync"
  type = map(
    object({
      id        = string
      name      = string
      kind      = string
      address   = string
      port      = number
      meta      = map(string)
      tags      = list(string)
      namespace = string
      status    = string

      node                  = string
      node_id               = string
      node_address          = string
      node_datacenter       = string
      node_tagged_addresses = map(string)
      node_meta             = map(string)

      cts_user_defined_meta = map(string)
    })
  )
}
This is used to essentially pull out the service data created in Consul. This might look confusing at first but this file simply describes what a service defined in Consul might look like.
The “type = map ( object ({} )” field is just another way of saying that a service is a collection of key/value pairs (with the value can be of any type — more often than not, a string or a map(string) — another collection of k/v pairs with v being a string).
Look at what a very simple service might look like this:
{
  "service": {
    "name": "fortinet-service",
    "id": "fortinet-service-s1",
    "address": "32.32.0.0",
    "meta": {
      "subnet_mask" : "255.255.0.0"
    }
  }
}
The other file we will need for the CTS module is a ‘template’ — like the main.tf below — that CTS will use to generate the Terraform configuration.
Remember that our use case is to speed up the creation of security rules on your edge firewall. We want to update the source IPs or the destination IPs in the rule automatically.
In essence, your Consul service represents the IP address or range of an application that needs access to another service or site.
CTS will automatically update the security rule based on the IP address/prefix defined in the service.
On a Fortinet appliance, the source is either an “address” or an “address group” (unsurprisingly, a group of addresses).
terraform {
  required_providers {
    # Provider source is used for Terraform discovery and installation of
    # providers. Declare source for all providers required by the module.
    fortios = {
      source  = "fortinetdev/fortios"
    }
  }
}

resource "fortios_firewall_address" "consul_service" {
  for_each = var.services
  name = each.value.id
  subnet     = "${each.value.address} ${lookup(each.value.meta, "subnet_mask", "255.255.255.255")}"
  type       = "ipmask"
  visibility = "enable"
}


resource "fortios_firewall_addrgrp" "ctsAddrGroup" {
  allow_routing = "disable"
  color         = 0
  exclude       = "disable"
  name          = "groupCts"
  visibility    = "enable"
  dynamic "member" {
    for_each = fortios_firewall_address.consul_service
    content {
      name = member.value["name"]
    }
  }
}
Let’s drill down into this code.
resource "fortios_firewall_address" "consul_service" {
  for_each = var.services
  name = each.value.id
  subnet     = "${each.value.address} ${lookup(each.value.meta, "subnet_mask", "255.255.255.255")}"
  type       = "ipmask"
  visibility = "enable"
}
This above will look at all the services created (for_each will iterate through all the services) and will create a "fortios_firewall_address" (Fortinet IP address object), based on the name and the IP address defined in Consul.
We need to include the subnet mask when we create an address object in Fortinet. It’s not a field present in a Consul Service definition (unlike the address one) so we need to provide a way for the user to optionally provide this information.
The lookup is therefore here to check whether the service was created with a meta object with a subnet mask. If the subnet mask was not provided, we will just use create a host object (/32).
Once we have created these address objects, we will add them to an address group as members. Because it’s a nested module, we need to use the dynamic function (I covered this in a previous blog post).
resource "fortios_firewall_addrgrp" "ctsAddrGroup" {
  allow_routing = "disable"
  color         = 0
  exclude       = "disable"
  name          = "groupCts"
  visibility    = "enable"
  dynamic "member" {
    for_each = fortios_firewall_address.consul_service
    content {
      name = member.value["name"]
    }
  }
}
In summary, these two files are all you actually need. Main.tf provides the template and variables.tf provides the input data for the Terraform files automatically generated and executed by CTS.
Let’s go and run the module.
CTS Configuration
CTS is a light-weight application that will monitor Consul for any changes to the service (which is why CTS is often referred to as a “daemon”). To start up CTS, you need to give it a HCL-based configuration and run the command:
consul-terraform-sync -config-file cts-config.hcl
Let’s have a look at the cts-config.hcl file:
consul {
  address = "localhost:8500"
}

driver "terraform" {
  # version = "0.14.0"
  # path = ""
  log = false
  persist_log = false
  working_dir = ""


  backend "consul" {
    gzip = true
  }

  required_providers {
    fortios = {
     source = "fortinetdev/fortios"
    }
  }
}

terraform_provider "fortios" {
    hostname = ""
    insecure = ""
    token = ""
}


task {
 name        = "fortinet"
 description = "fortinet"
 providers   = ["fortios"]
 source      = "nvibert/module-nia/fortios"
 # version     = "1.2.0"
 services    = ["fortinet-service"]
 #variable_files = ["../"]
}
Let’s go through these one by one but the doc is excellent if you want all the details.
This config line specifies the Consul settings. I use Consul locally but you will probably run hosted Consul or an enterprise version so you will need to specify TLS settings, username/password etc…
consul {
  address = "localhost:8500"
}
Next you might want to specify the version of Terraform you want to run. I just use the default settings here.
driver "terraform" {
  # version = "0.14.0"
  # path = ""
  log = false
  persist_log = false
  working_dir = ""
}
You also have to specify the backend configuration settings for Terraform. The Terraform state could be saved locally, in the Cloud (S3, Google Storage, Terraform Cloud) or…. in Consul (yeah, that’s a bit confusing as Consul in this context is not only used for Service Discovery but for Key/Value Store).
  backend "consul" {
    gzip = true
  }
Then, you need the provider configuration – where to find it, which version and the essential variables, like the IP address of your Firewall and its username/password. Follow this if you want more details.
required_providers {
    fortios = {
      source = "fortinetdev/fortios"
      #version = "3.33.0"
    }
  }
}

terraform_provider "fortios" {
}
Finally, you have to specify the task:
task {
 name        = "fortinet-test"
 description = "fortinet"
 providers   = ["fortios"]
 source      = "nvibert/module-nia/fortios"
 # version     = "0.1.0"
 services    = ["fortinet-service"]
 #variable_files = ["../"]
}
The detailed configuration details are here but essentially, we tell CTS which module to use and to only apply the configuration task for services with an ID “fortinet-service”.
And that’s it. I am now ready to run CTS:
% consul-terraform-sync -config-file cts-config.hcl
Once I create the service – the one I had described earlier, with the id “fortinet-service” and the address “32.32.0.0” – the CTS daemon notices the new service being created and executes the task accordingly:
2021/09/30 16:16:38.197071 [INFO] (ctrl) executing task fortinet-test
2021/09/30 16:16:39.774441 [INFO] (ctrl) task completed fortinet-test
CTS creates a set of TF files:
% tree
.
├── main.tf
├── providers.tfvars
├── terraform.tfvars
├── terraform.tfvars.tmpl
└── variables.tf
The files are automatically populated by the data explicitly or implicitly set up in the CTS config file and by the services definition in Consul. For example, terraform.tfvars will look like this:
services = {
  "fortinet-service-s1.nicovibert-C02G964YMD6R.dc1" = {
    id      = "fortinet-service-s1"
    name    = "fortinet-service"
    kind    = ""
    address = "32.32.0.0"
    port    = 0
    meta = {
      subnet_mask = "255.255.0.0"
    }
    tags            = []
    namespace       = ""
    status          = "passing"
    node            = "nicovibert-C02G964YMD6R"
    node_id         = "ca7b147a-08b0-e319-b04c-44e5b9a5ed22"
    node_address    = "127.0.0.1"
    node_datacenter = "dc1"
    node_tagged_addresses = {
      lan      = "127.0.0.1"
      lan_ipv4 = "127.0.0.1"
      wan      = "127.0.0.1"
      wan_ipv4 = "127.0.0.1"
    }
    node_meta = {
      consul-network-segment = ""
    }
    cts_user_defined_meta = {}
  },
  "fortinet-service-s2.nicovibert-C02G964YMD6R.dc1" = {
    id      = "fortinet-service-s2"
    name    = "fortinet-service"
    kind    = ""
    address = "34.34.0.0"
    port    = 0
    meta = {
      subnet_mask = "255.255.255.0"
    }
    tags            = []
    namespace       = ""
    status          = "passing"
    node            = "nicovibert-C02G964YMD6R"
    node_id         = "ca7b147a-08b0-e319-b04c-44e5b9a5ed22"
    node_address    = "127.0.0.1"
    node_datacenter = "dc1"
    node_tagged_addresses = {
      lan      = "127.0.0.1"
      lan_ipv4 = "127.0.0.1"
      wan      = "127.0.0.1"
      wan_ipv4 = "127.0.0.1"
    }
    node_meta = {
      consul-network-segment = ""
    }
    cts_user_defined_meta = {}
  },
}
I ran Consul locally on my Mac so my Consul node is my Mac user name and the other values like the datacenter are the default ones.
And my main.tf configuration is exactly what I want it to be:
terraform {
  required_version = ">= 0.13.0, < 1.1.0"
  required_providers {
    fortios = {
      source = "fortinetdev/fortios"
    }
  }
  backend "consul" {
    address = "localhost:8500"
    gzip    = true
    path    = "consul-terraform-sync/terraform"
  }
}

provider "fortios" {
  hostname = var.fortios.hostname
  insecure = var.fortios.insecure
  token    = var.fortios.token
}

# fortinet
module "fortinet-test" {
  source   = "nvibert/module-nia/fortios"
  services = var.services
}
Testing the module
Unsurprisingly, I had to do a fair bit of trial-and-error to get the syntax of the module right.
While testing and building the module, you will probably doing it locally (before the module is actually published on the Terraform Registry). In that case, the source in your task in your cts-config.hcl config will point to a local directory and might look like this:
task {
 name        = "fortinet-test"
 description = "fortinet"
 providers   = ["fortios"]
 source      = "../test-module-nia"
 services    = ["fortinet-service"]
}
When building the module, I recommend you build it without CTS pulling the data from Consul — fewer things to troubleshoot — so we recommend you input mock variables.
For me, it meant my mock variables.tf file looked like this:
services = {
  "fortinet-service.nicovibert-C02G964YMD6R.dc1" = {
    id      = "fortinet-service"
    name    = "fortinet-service"
    kind    = ""
    address = "32.32.0.0"
    port    = 0
    meta = {
      subnet_mask = "255.255.0.0"
    }
    tags            = []
    namespace       = ""
    status          = "passing"
    node            = "nicovibert-C02G964YMD6R"
    node_id         = "ca7b147a-08b0-e319-b04c-44e5b9a5ed22"
    node_address    = "127.0.0.1"
    node_datacenter = "dc1"
    node_tagged_addresses = {
      lan      = "127.0.0.1"
      lan_ipv4 = "127.0.0.1"
      wan      = "127.0.0.1"
      wan_ipv4 = "127.0.0.1"
    }
    node_meta = {
      consul-network-segment = ""
    }
    cts_user_defined_meta = {}
  }
}
Once you have created the modules, you can use it locally, publish it privately or on the official registry. Publishing a module on the Terraform Registry is really straight-forward. You just need to make sure the repo follows the right naming convention, has a tag & release and a READ.ME. Mine is here .
Enough of the code – let’s have a look at the UIs for once:
Once I create a service (which could just be by saving the service definition in a JSON file in the Consul configuration directory (consul.d)) and reload Consul, the following service will show up.

In a couple of seconds, my object appears on Fortinet:

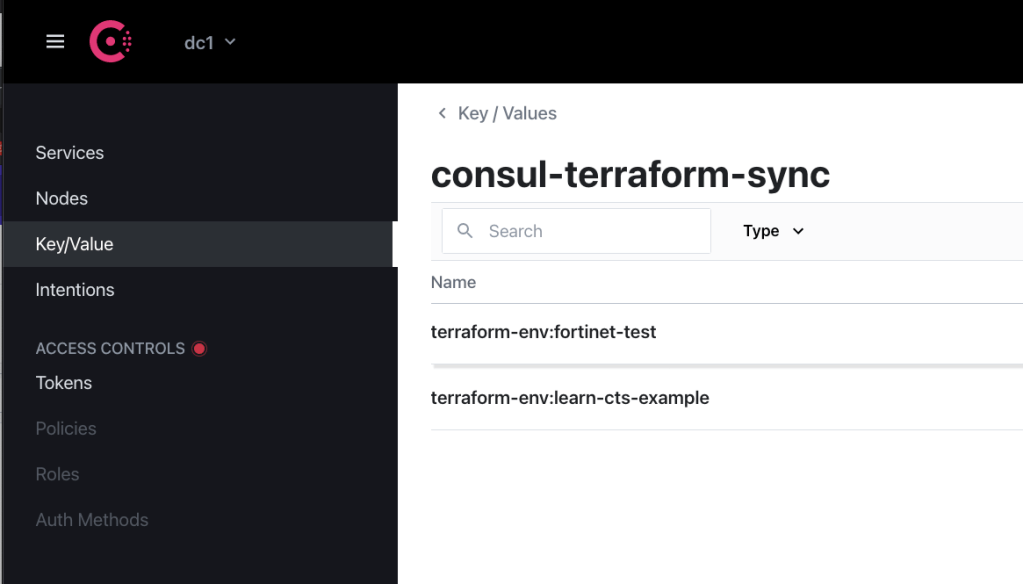
And the Terraform state is stored in the Key-Value store of Consul.
And that’s it! My network config has been updated without me having to raise a ticket. My services are registered on a service register and not on a spreadsheet that nobody will ever locate or update. And Terraform was executed without my awareness.

5 thoughts on “Consul-Terraform-Sync – Part 2: Building a Module”