
As I was becoming familiar with Terraform and all the clouds it could automate, I started to realize there were things it couldn’t interact with. Even within VMware, while we have a number of providers for services and products like NSX-T, vSphere, VMware Cloud, vCloud Director or vRealize Automation, there are still many products that didn’t have an official provider.
Not only that but even existing providers, like the NSX-T one, were not quite complete. That’s to be expected – we only have limited engineering resources – but still, it would be nice to provide feature parity between what is possible on the UI or over the ‘raw’ APIs and between the Terraform provider.
When I started to work with Antoine Deleporte, I was impressed by his ability to create providers for HCX, VeloCloud – well, I know he can only build a brand new API but also build a Terraform provider for it (that’s what we did during our hacknite session).
Could I, with a lot of work and research, contribute to or build a provider?
It turned out that while consuming Terraform was fun… building Terraform was even better.
Terraform Providers
The way users can deploy cloud resources with Terraform is with Terraform providers – essentially a plugin leveraged by the Terraform executable to interact with a cloud or, more precisely, with any programmable interface.
If a user wants to consume blabla resources through Terraform, he/she will include a provider blabla in the Terraform configuration file. Terraform, during a “terraform init”, will download the Terraform provider for the blabla cloud via the Terraform Registry (I wrote extensively about it in this post).

The code for the Terraform provider blabla is written in Go and each provider build is specific to the operating system (unlike Python, Go is a language that requires compiling). Terraform being Open Source, the code for the provider is stored on GitHub.
If you take the popular NSX-T Provider for example, it’s published on the Terraform registry and its code is on GitHub here.
While the product team tries to offer Terraform support for all NSX-T features, it’s impossible to provide complete feature sets. For example, while many customers build VPN with NSX-T (including on VMware Cloud on AWS), it wasn’t possible to build them via Terraform yet.
I wanted to provide this functionality to my customers (and to the ones that have requested this feature here).
In this post, I will talk at length about how I wrote the code to provide this functionality.
I am still learning Go so expect some inaccuracies below. I will also try to explain it in layman’s terms – the way I wish somebody had explained it to me when I got started. I won’t expect you to know Go but I will expect you to be familiar with Terraform and ideally a programming language like Python.
When you build a Terraform provider, you essentially provide a mechanism for users to interact with the APIs of the resource you want to consume. Which means you need to think about authentication and consumption of the APIs.
The NSX-T provider already includes authentication against NSX-T on-premises or running on VMware Cloud on AWS so I didn’t have to worry about coding the authentication logic. There were already dozens of resources and data sources configured which I could use as examples.
Was it easy then? Not quite. Here are some tips to get started before we dive into the code.
Extending an existing provider
Know your APIs
The first tip I will give anyone who wants to extend Terraform is that they must know the APIs of the product they want to interact extremely well. This is somehow more important than Go programming skills.
Building a L2VPN for example might require 4 API calls (as explained in this post) and best practices dictate that we should create a resource per API call. My project therefore quickly expanded to multiple resources.
Identify the required Datasources
You need to think about the logic of the code before you start coding.
For example, the VPN APIs requires that the VPN is attached to an NSX-T edge. VMware Cloud on AWS comes with pre-configured NSX-T edges (Compute Gateway and Management Gateway) so when building a VPN on VMware Cloud on AWS, we will need to refer to the API path of an existing object.
How do we determine the API path of an object that has not been created by Terraform?
If you use Terraform regularly, you’ll know that the answer is: by using a datasource!
When you start extending the Terraform provider, you will need to consider whether you need to build data sources in addition to resources.
Go SDK Bindings
The Go Software Development Kit (SDK) Bindings are, in simple terms, coding shortcuts you can insert in your code to consume an API.
For example, for the NSX Terraform provider, the Go SDK bindings consist of Go files that can, when executed, create, read, update or delete NSX-T resources like firewall rules, networks or VPNs.
The Go SDK Bindings are actually not created manually but automatically from the documented APIs.
This is not a requirement to create a provider but when the Go SDKs exist, it makes thing much much easier to create.
As you will see below, I use the Go SDK bindings extensively to make the process of creating my resource much faster. The VMware SDKs can be found here.
Requirements
You will need Visual Studio Code, go and git on your laptop.
Creating a new resource
A new resource will always follow the same naming convention (some of the naming rules are pretty strict while others are best practice).
If you go into the Terraform repo on GitHub, you will see resources_xxxxxxxxxx.go, with xxxxxx the type of resources Terraform will create on your behalf. There are actually two per resources – one to manage the resource and one that finishes with “_test” that will be used for testing purposes (I will cover this in another blog).

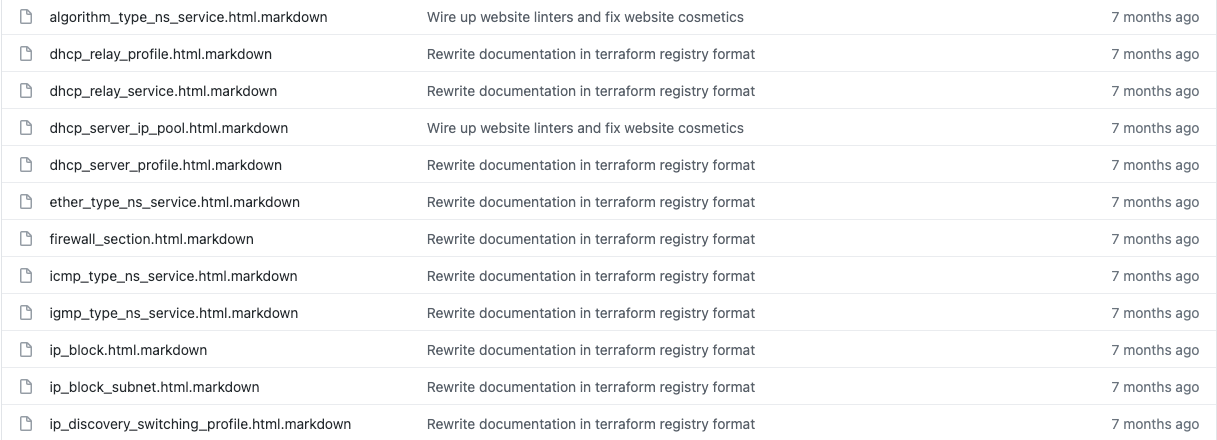
If you want to create a new resource, you will also need to create a documentation – based on a template – for users to know how to use the resources. The doc is written in Markdown (like all README.md files on GitHub). Here are the corresponding files for the resources above:
Getting started with the code
Sometimes I find the best way to learn a new programming language is by reverse engineering some existing code. So let’s have a look at what I’ve done to add the VPN functionality to the provider. I will focus on one of the types of resources needed to create a VPN: creating a IKE profile (essentially the encryption and algorithms settings for a VPN).
Packages:
In Go, all Go sources files must belong to a package (a package is a group of Go source go files that can be shared). All the resources in the NSX-T provider will belong to the nsxt package.
We also import some packages that we will be using through the code.
Go doesn’t let you compile a code where you are importing packages that you are not using. It’s designed to make your code much faster that way.
package nsxt

import (
	"fmt"
	"log"

	"github.com/hashicorp/terraform-plugin-sdk/v2/helper/schema"
	"github.com/hashicorp/terraform-plugin-sdk/v2/helper/validation"
	"github.com/vmware/vsphere-automation-sdk-go/runtime/protocol/client"
	"github.com/vmware/vsphere-automation-sdk-go/services/nsxt/infra"
	"github.com/vmware/vsphere-automation-sdk-go/services/nsxt/model"
)
See the name of the packages like “log”, “schema”, “validation”, “infra” or “model” ? I will be referring to these later on in my code. When I refer to a function (a function is a simple programming element) called CreateNSXRule within the infra package, I will call it by using infra.CreateNSXRule().
Next, we have our main function:
func resourceNsxtPolicyIpsecVpnIkeProfile() *schema.Resource {
	return &schema.Resource{
		Create: resourceNsxtPolicyIpsecVpnIkeProfileCreate,
		Read:   resourceNsxtPolicyIpsecVpnIkeProfileRead,
		Update: resourceNsxtPolicyIpsecVpnIkeProfileUpdate,
		Delete: resourceNsxtPolicyIpsecVpnIkeProfileDelete,
		Importer: &schema.ResourceImporter{
			State: schema.ImportStatePassthrough,
		},

		Schema: map[string]*schema.Schema{
///////////// Example
			"description": {
				Type:        schema.TypeString,
				Description: "Description of this resource",
				Optional:    true,
			},
///////////// Example
			"encryption_algorithms": {
				Type:        schema.TypeSet,
				Description: "Encryption algorithm is used during Internet Key Exchange(IKE) negotiation. Default is AES_128.",
				Elem: &schema.Schema{
					Type:         schema.TypeString,
					ValidateFunc: validation.StringInSlice(IPSecVpnIkeProfile_ENCRYPTION_ALGORITHMS, false),
				},
				Required: true,
			},
		},
	}
}
Here we define the main function that will be run when we run a Terraform Plan/Apply (assuming that we have, in our Terraform file, the resource nsxt_policy_ipsec_vpn_ike_profile). You will recognize the standard REST APIs methods – CRUD (Create Read Update Delete) – that are executed by Terraform. You will also see the Importer function, which is used by Terraform to bring a Terraform created outside of Terraform under Terraform control.
Further down the code, we will define the 4 following functions:
resourceNsxtPolicyIpsecVpnIkeProfileCreate
resourceNsxtPolicyIpsecVpnIkeProfileRead
resourceNsxtPolicyIpsecVpnIkeProfileUpdate
resourceNsxtPolicyIpsecVpnIkeProfileDelete
What we also do in the first block is defining the attributes the user would define in his/her .tf files. For example, if I want to create a VPN, I may have, in my main.tf, an encryption algorithm or an authentication key. Terraform uses schemas to describe these attributes and the values they may have. This is a really important aspect of Terraform development so let’s will review these examples:
			"description": {
				Type:        schema.TypeString,
				Description: "Description of this resource",
				Optional:    true,
			},
The first above is the description of the resource. In the tf file, you will have something like:
description = "Terraform-provisioned IKE Profile"
We need to specify the behaviour of the schema. For example, it will be a string of characters (hence TypeString) and it will be “Optional” (the user does not need to insert it in his/her .tf file).
			"encryption_algorithms": {
				Type:        schema.TypeSet,
				Description: "Encryption algorithm is used during Internet Key Exchange(IKE) negotiation. Default is AES_128.",
				Elem: &schema.Schema{
					Type:         schema.TypeString,
					ValidateFunc: validation.StringInSlice(IPSecVpnIkeProfile_ENCRYPTION_ALGORITHMS, false),
				},
				Required: true,
			},
The second one above is a TypeSet – in this instance, there is a limited choice of options (as we only support a number of encryption algorithms). This encryption algorithm is absolutely required (Required: true) and Terraform will not deploy unless the user not only provide a value but provides the correct one. We use ValidateFunc to make sure that the value provided is amongst the list of variables (that list is below and is essentially a list of strings representing the acceptable algorithm values).
var IPSecVpnIkeProfile_ENCRYPTION_ALGORITHMS = []string{
	model.IPSecVpnIkeProfile_ENCRYPTION_ALGORITHMS_128,
	model.IPSecVpnIkeProfile_ENCRYPTION_ALGORITHMS_256,
	model.IPSecVpnIkeProfile_ENCRYPTION_ALGORITHMS_GCM_128,
	model.IPSecVpnIkeProfile_ENCRYPTION_ALGORITHMS_GCM_192,
	model.IPSecVpnIkeProfile_ENCRYPTION_ALGORITHMS_256,
}
Remember how I talked about the packages? You can see how I am using the model package above. This package includes a description of every single NSX-T object with a description of their type.
This is where using an IDE like Visual Studio Code is so important.
As you can see below, I can find the definition of each object by right-clicking and searching for where it was originally defined. The first right-click takes me back to the beginning of the file, where I provided the acceptable values but the second one takes me to the model package (in a separate file).
The model package wasn’t something I created myself – it’s part of the Go SDK bindings that were kindly created for me to use.
Remember that Go is a strongly-typed language, which means any language element that stores a value has a type associated with it. In this instance, the IPSecVpnIkeProfile is an element that has a very specific structure, defined with the command type IPSecVpnIkeProfile struct command. The model file can be found here but for this specific element, the config is below (shortened for clarity):
// IKE Profile is a reusable profile that captures IKE phase one negotiation parameters. Any changes affects all IPSec VPN sessions consuming this profile.
type IPSecVpnIkeProfile struct {
    // ID of the user who created this resource
	CreateUser *string
    // Description of this resource
	Description *string
    // Defaults to ID if not set
	DisplayName *string
    // Unique identifier of this resource
	Id *string
    // The type of this resource.
	ResourceType *string
    // Possible values are:
    //
    // * IPSecVpnIkeProfile#IPSecVpnIkeProfile_DH_GROUPS_GROUP2
    // * IPSecVpnIkeProfile#IPSecVpnIkeProfile_DH_GROUPS_GROUP5
    // * IPSecVpnIkeProfile#IPSecVpnIkeProfile_DH_GROUPS_GROUP14
    // * IPSecVpnIkeProfile#IPSecVpnIkeProfile_DH_GROUPS_GROUP15
    // * IPSecVpnIkeProfile#IPSecVpnIkeProfile_DH_GROUPS_GROUP16
    // * IPSecVpnIkeProfile#IPSecVpnIkeProfile_DH_GROUPS_GROUP19
    // * IPSecVpnIkeProfile#IPSecVpnIkeProfile_DH_GROUPS_GROUP20
    // * IPSecVpnIkeProfile#IPSecVpnIkeProfile_DH_GROUPS_GROUP21
    //
    //  Diffie-Hellman group to be used if PFS is enabled. Default is GROUP14.
	DhGroups []string
    // Possible values are:
    //
    // * IPSecVpnIkeProfile#IPSecVpnIkeProfile_DIGEST_ALGORITHMS_SHA1
    // * IPSecVpnIkeProfile#IPSecVpnIkeProfile_DIGEST_ALGORITHMS_SHA2_256
    // * IPSecVpnIkeProfile#IPSecVpnIkeProfile_DIGEST_ALGORITHMS_SHA2_384
    // * IPSecVpnIkeProfile#IPSecVpnIkeProfile_DIGEST_ALGORITHMS_SHA2_512
    //
    //  Algorithm to be used for message digest during Internet Key Exchange(IKE) negotiation. Default is SHA2_256.
	DigestAlgorithms []string
    // Possible values are:
    //
    // * IPSecVpnIkeProfile#IPSecVpnIkeProfile_ENCRYPTION_ALGORITHMS_128
    // * IPSecVpnIkeProfile#IPSecVpnIkeProfile_ENCRYPTION_ALGORITHMS_256
    // * IPSecVpnIkeProfile#IPSecVpnIkeProfile_ENCRYPTION_ALGORITHMS_GCM_128
    // * IPSecVpnIkeProfile#IPSecVpnIkeProfile_ENCRYPTION_ALGORITHMS_GCM_192
    // * IPSecVpnIkeProfile#IPSecVpnIkeProfile_ENCRYPTION_ALGORITHMS_GCM_256
    //
    //  Encryption algorithm is used during Internet Key Exchange(IKE) negotiation. Default is AES_128.
	EncryptionAlgorithms []string
    // Possible values are:
    //
    // * IPSecVpnIkeProfile#IPSecVpnIkeProfile_IKE_VERSION_V1
    // * IPSecVpnIkeProfile#IPSecVpnIkeProfile_IKE_VERSION_V2
    // * IPSecVpnIkeProfile#IPSecVpnIkeProfile_IKE_VERSION_FLEX
    //
    //  IKE protocol version to be used. IKE-Flex will initiate IKE-V2 and responds to both IKE-V1 and IKE-V2.
	IkeVersion *string
    // Life time for security association. Default is 86400 seconds (1 day). format: int64
	SaLifeTime *int64
}
What you can see above is that a IPSecVpnIkeProfile follows a very specific format. It’s made of other types, known as fields.
Some fields are compulsory, some are optional (the one with * are optional). Some are just strings, some are array of strings ([]string) while some are booleans or integers.
This is an absolutely essential aspect of Go in general and you won’t go very far developing Terraform without a good understanding of your types. But as I mentioned earlier, as long as you understand the APIs Terraform will leverage, the models used above will be pretty obvious.
Let’s move on to the function required to create a resource. They should follow a standard name (like resourceResourceNameCreate). This is mine:
func resourceNsxtPolicyIpsecVpnIkeProfileCreate(d *schema.ResourceData, m interface{}) error {
	connector := getPolicyConnector(m)

	// Initialize resource Id and verify this ID is not yet used
	id, err := getOrGenerateID(d, m, resourceNsxtPolicyIpsecVpnIkeProfileExists)
	if err != nil {
		return err
	}

	displayName := d.Get("display_name").(string)
	description := d.Get("description").(string)
	ike_version := d.Get("ike_version").(string)
	DhGroups := getStringListFromSchemaSet(d, "dh_groups")
	DigestAlgorithms := getStringListFromSchemaSet(d, "digest_algorithms")
	EncryptionAlgorithms := getStringListFromSchemaSet(d, "encryption_algorithms")

	obj := model.IPSecVpnIkeProfile{
		DisplayName:          &displayName,
		Description:          &description,
		IkeVersion:           &ike_version,
		DhGroups:             DhGroups,
		DigestAlgorithms:     DigestAlgorithms,
		EncryptionAlgorithms: EncryptionAlgorithms,
	}

	// Create the resource using PATCH
	log.Printf("[INFO] Creating IpsecVpnIkeProfile with ID %s", id)

	client := infra.NewDefaultIpsecVpnIkeProfilesClient(connector)
	err = client.Patch(id, obj)

	if err != nil {
		return handleCreateError("IpsecVpnIkeProfile", id, err)
	}

	d.SetId(id)
	d.Set("nsx_id", id)

	return resourceNsxtPolicyIpsecVpnIkeProfileRead(d, m)
What the function will take in input when creating the resources are the parameters defined in the .tf files. What we do here in the highlighted lines 10-15 is extracting the values from the .tf files to variables.
We then refer to these variables when we create an object based on the IPSecVpnIkeProfile (see line 17).
What we have now is an IPSecVpnIkeProfile object that only needs to be created using the API.
This is what these 2 lines will do:
client := infra.NewDefaultIpsecVpnIkeProfilesClient(connector)
err = client.Patch(id, obj)
We create a client object using the Go SDK bindings. This specific one is located here.
We will then trigger a “Patch” API request. Patch returns an error message if there is an error and nothing if not (which explains the syntax which was confusing to me at first).
The other functions – Update, Delete and Read – are all pretty similar. And of course, you can make them more and more sophisticated to prevent any potential errors or incompatibilities but in short, the logic is not that complicated.
We are not quite finished though. We need to update to the provider.go file.
The provider lists the resources and data sources accepted by the provider:
DataSourcesMap: map[string]*schema.Resource{
/// Cut for brevity

			"nsxt_transport_zone":                   dataSourceNsxtTransportZone(),
			"nsxt_switching_profile":                dataSourceNsxtSwitchingProfile(),
			"nsxt_policy_context_profile":           dataSourceNsxtPolicyContextProfile(),
			"nsxt_policy_dhcp_server":               dataSourceNsxtPolicyDhcpServer(),
			"nsxt_policy_bfd_profile":               dataSourceNsxtPolicyBfdProfile(),

		ResourcesMap: map[string]*schema.Resource{
			//// Cut for brevity
			"nsxt_policy_evpn_tenant":                      resourceNsxtPolicyEvpnTenant(),
			"nsxt_policy_evpn_config":                      resourceNsxtPolicyEvpnConfig(),
			"nsxt_policy_evpn_tunnel_endpoint":             resourceNsxtPolicyEvpnTunnelEndpoint(),
			"nsxt_policy_qos_profile":                      resourceNsxtPolicyQosProfile(),
			"nsxt_policy_ospf_config":                      resourceNsxtPolicyOspfConfig(),
			"nsxt_policy_ospf_area":                        resourceNsxtPolicyOspfArea(),
			"nsxt_policy_ipsec_vpn_ike_profile":            resourceNsxtPolicyIpsecVpnIkeProfile(),
		},
I added the highlighted line to make sure that the provider accepts when I create the following resource in my TF file:
resource "nsxt_policy_ipsec_vpn_ike_profile" "profile_ike" {
  display_name          = "IPSec VPN Ike Profile-3"
  description           = "Terraform-provisioned IPsec VPN Ike Profile-name"
  encryption_algorithms = ["AES_128"]
  digest_algorithms     = ["SHA2_256"]
  dh_groups             = ["GROUP14"]
  ike_version           = "IKE_V2"
}
You can see above the encryption algorithms provided.
Now, because of the validation I coded in initially, if I input the wrong encryption algorightms, well, I will be told in clear terms what I am doing wrong.
At time of writing, the NSX-T enhancements I am working on are still experimental and not part of the Terraform provider. You can find my work here.
I plan to raise a Pull Request soon to get it included, once I am satisfied with my work.
As I continue to learn about developing Terraform, I will follow up with some posts around troubleshooting Terraform development and on the unit tests and documentations (two essential aspects which I have so far ignored).
Hopefully this post below shows that anyone – even an absolute novice in Go – can expand a Terraform provider. Just make sure you follow these two rules:
- Use the Go SDKs of the product you want to consume
- Understand the APIs of the product you want to consume
Thanks for reading.

2 thoughts on “Extending Terraform – A Deep Dive”